28 Oct Primavera P6 How Can Primavera P6 Certification Boost Your Job Opportunities? January 19, 2026 By Eng waqas Ahmad Continue reading
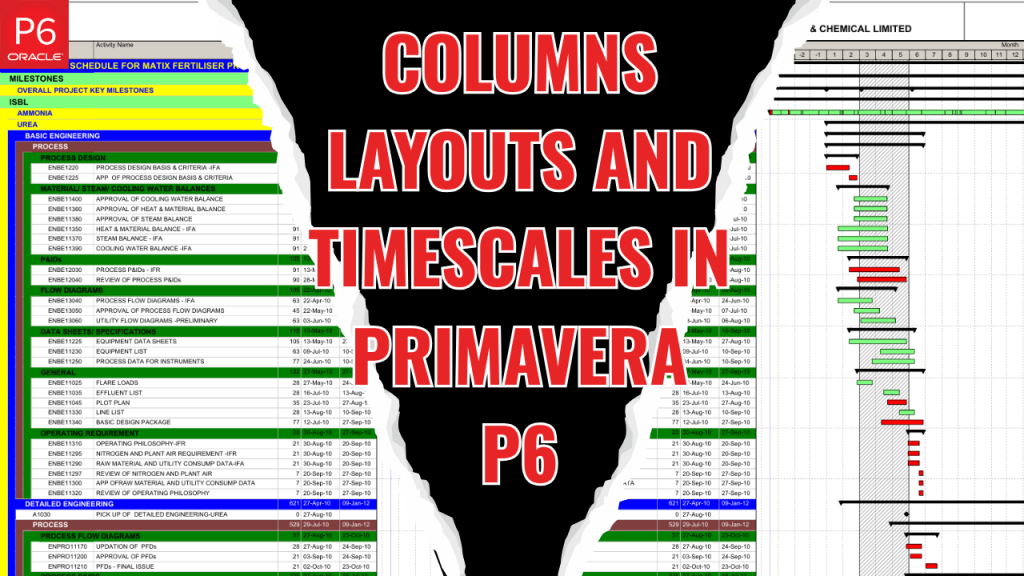
28 Jun News, Primavera P6 How to Set Up Columns, Layouts, and Timescales in Primavera P6 January 19, 2026 By Eng waqas Ahmad Continue reading
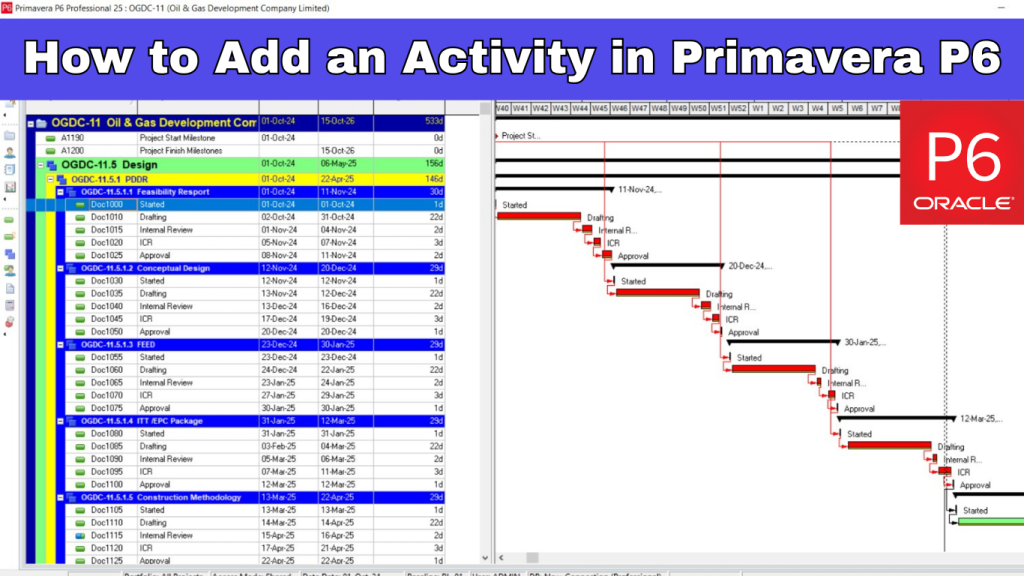
19 Jun News, Primavera P6 How to Add an Activity in Primavera P6 January 19, 2026 By Eng waqas Ahmad Continue reading
04 Jun Delay Analysis, EPC Planning, Primavera P6 Primavera P6 Latest Version Review: 24.12 Features & Benefits January 19, 2026 By Eng waqas Ahmad Continue reading
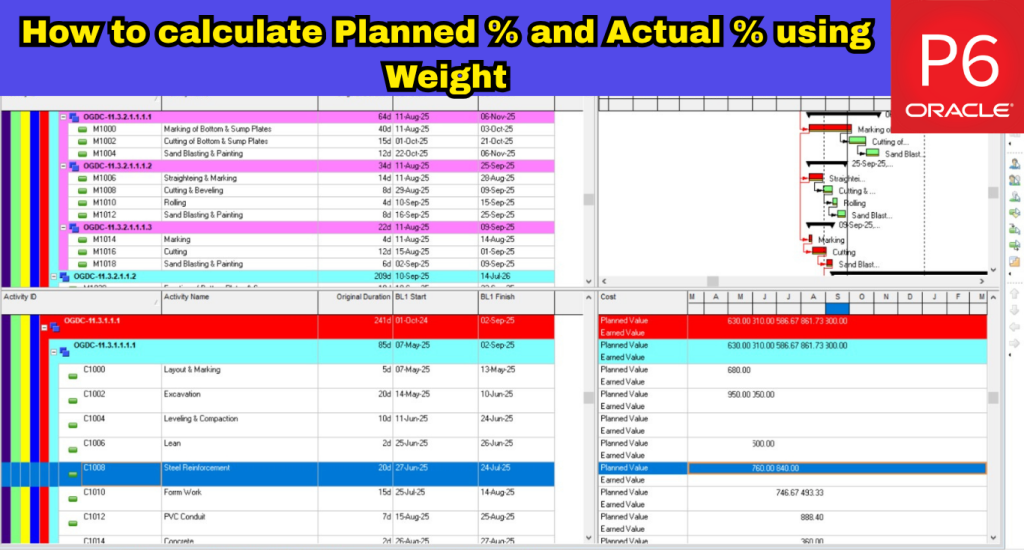
02 Jun News How to calculate Planned % and Actual % using Weight January 19, 2026 By Eng waqas Ahmad Continue reading
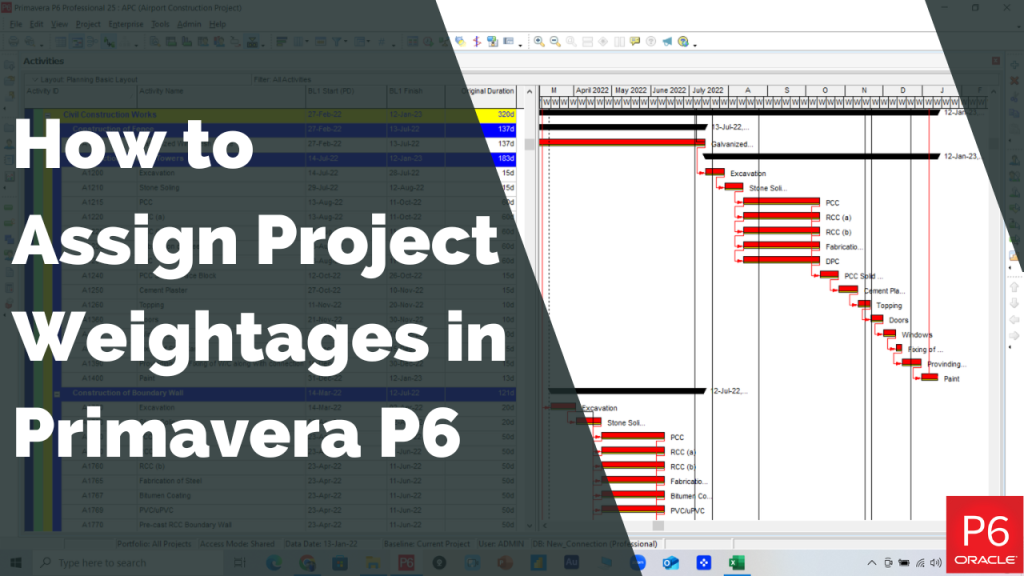
24 May News, Primavera P6 Step-by-Step Guide on How to Assign Project Weightages in Primavera P6 January 19, 2026 By Eng waqas Ahmad Continue reading
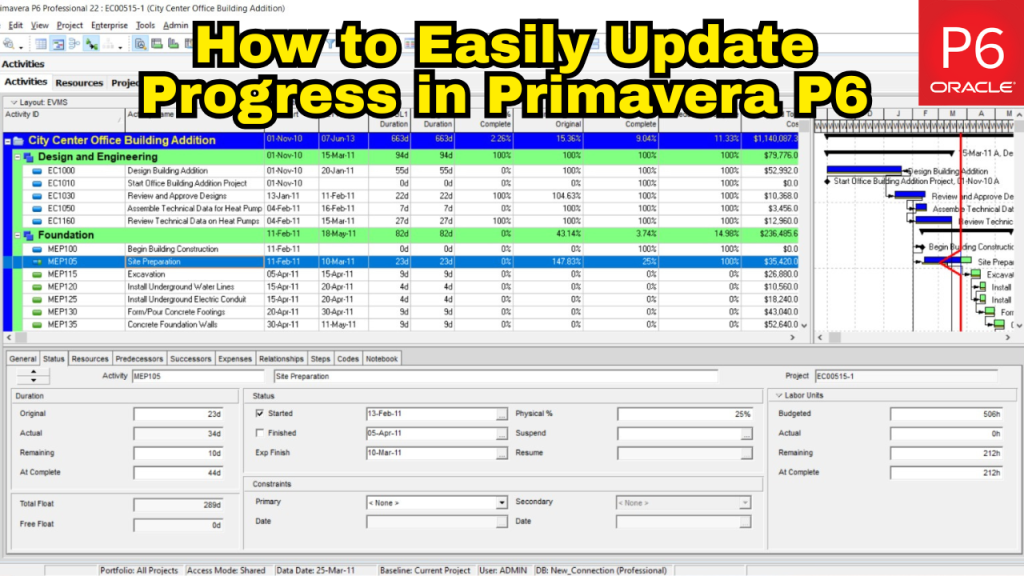
13 May EPC Planning, News, Primavera P6 How to Easily Update Progress in Primavera P6l January 19, 2026 By Eng waqas Ahmad Continue reading
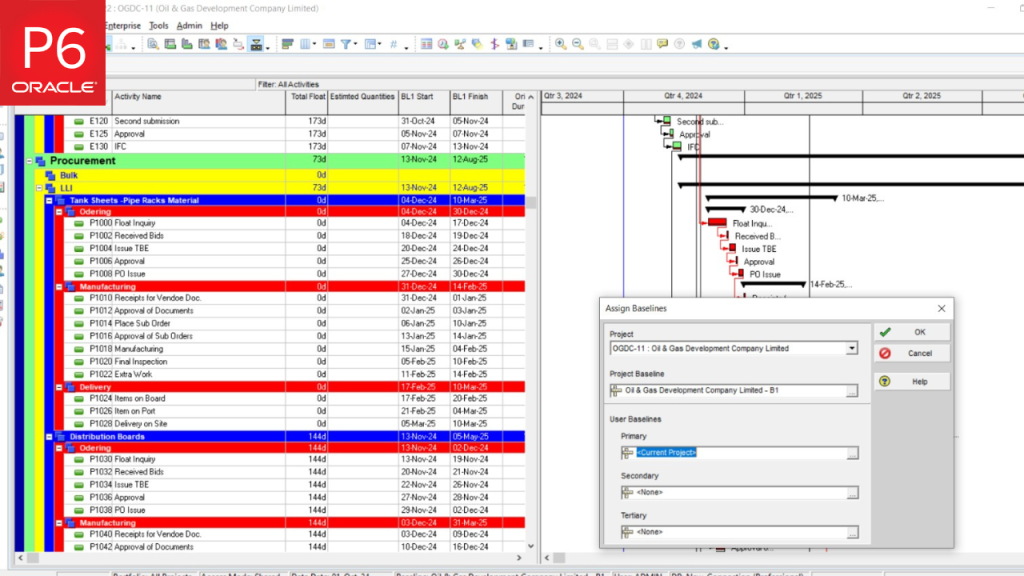
09 May EPC Planning, News, Primavera P6 How to Show 4 Baselines on the Gantt Chart in Primavera P6 January 19, 2026 By Eng waqas Ahmad Continue reading
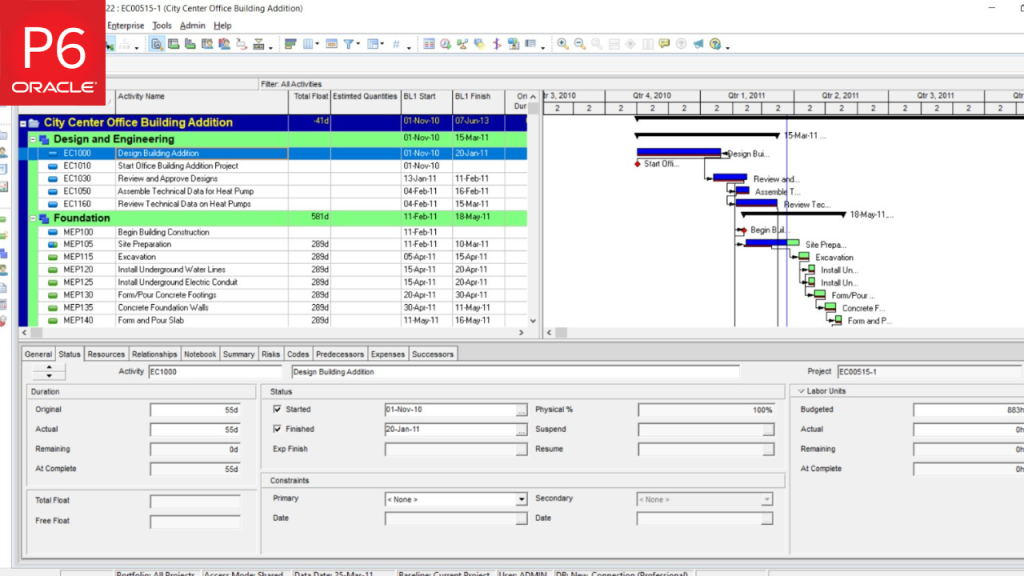
07 May Delay Analysis, EPC Planning, Primavera P6, Shutdown Management How to Remove Actuals from a Primavera P6 Schedule (Step-by-Step) January 19, 2026 By Eng waqas Ahmad Continue reading
14 Mar EPC Planning, News, Primavera P6 A Step-by-Step Guide to Primavera P6 Software Basic Settings January 19, 2026 By Eng waqas Ahmad Continue reading