Auto-scheduling in Primavera P6 is more than a convenience; it is a vital feature for maintaining precise, efficient, and consistently updated project schedules. For professionals managing complex construction, engineering, or multidisciplinary programs, this feature enhances the accuracy and reliability of Primavera P6 scheduling by ensuring that every change is immediately reflected across the entire plan.
In this guide, we walk you through how to enable auto-scheduling in Primavera P6 so you can streamline your workflow and maintain stronger project-control standards.
6 Steps to Enable Auto-Scheduling in Primavera P6
Follow these simple steps to turn on auto-scheduling in Primavera P6:
- Go to the P6 ribbon and navigate to Tools > Schedule to access the Schedule dialog box.
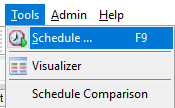
Source: https://www.onepager.com/tips/primavera-p6/auto-schedule-in-p6.html
- In the dialog box that appears, click Options to view the scheduling configuration settings.
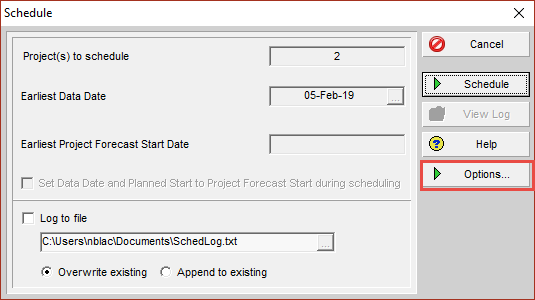
Source: https://www.onepager.com/tips/primavera-p6/auto-schedule-in-p6.html
- Under the General tab, check the box for Schedule automatically when a change affects dates to activate auto-scheduling.
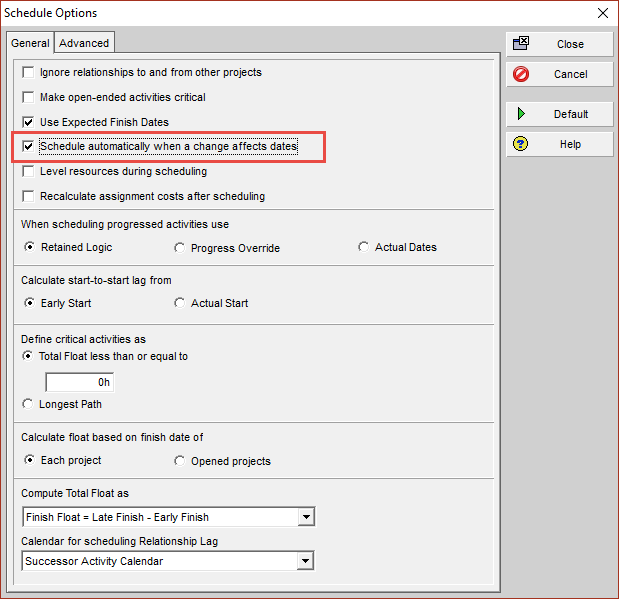
Source: https://www.onepager.com/tips/primavera-p6/auto-schedule-in-p6.html
- Click Close to save your Schedule Options. Then return to the main Schedule dialog and hit the green Schedule button to apply the update.
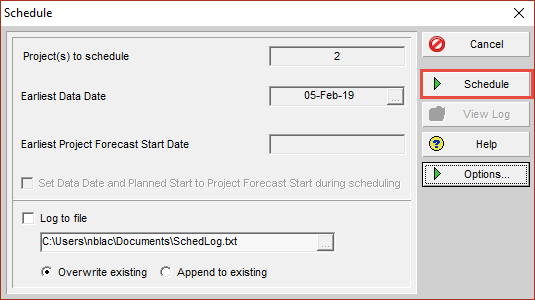
Source: https://www.onepager.com/tips/primavera-p6/auto-schedule-in-p6.html
- Your activity list will now adjust automatically. For example, the start date for the Define resource list from the kickoff meeting report will realign with the Project kickoff meeting based on the finish-to-start dependency.

Source: https://www.onepager.com/tips/primavera-p6/auto-schedule-in-p6.html
- From now on, as you add activities or modify dependencies, Primavera P6 will automatically shift dates to keep your project plan accurate and up-to-date.
Want to Learn More About Scheduling!
Watch our detailed tutorial on building construction scheduling with Primavera P6.
Auto-Scheduling vs Manual Scheduling: Which Should You Use and When?
Both auto-scheduling and manual Primavera P6 scheduling serve essential purposes. However, the best choice depends on the project’s complexity and the frequency of updates.
Use Auto-Scheduling When
- Your project has many dependencies, constraints, or resource-driven activities.
- You want every change, such as adding activities or adjusting logic, to update the entire schedule instantly.
- You need faster updates during active phases like planning, coordination, or weekly reporting.
- You want to reduce manual errors and ensure the schedule stays consistent and accurate.
Use Manual Scheduling When
- You are analyzing “what-if” scenarios and don’t want the schedule to shift automatically.
- You’re making multiple changes at once and prefer to review everything before applying updates.
- Your project is small, stable, or has minimal dependency changes.
- You want more control over when the schedule recalculates dates.
Conclusion
Enabling auto-scheduling in Primavera P6 is a powerful way to maintain accurate project timelines, reduce manual effort, and ensure that every dependency and activity is updated seamlessly.
In this blog, we’ve walked you through the step-by-step process of accessing the Schedule dialog box, enabling the automatic update option, and applying schedule updates. We also compared auto-scheduling with manual scheduling, explaining when each method is most effective.
In short, implementing auto-scheduling will ensure that your schedules remain accurate and updates are applied instantly, thereby reducing manual effort and minimizing errors.
