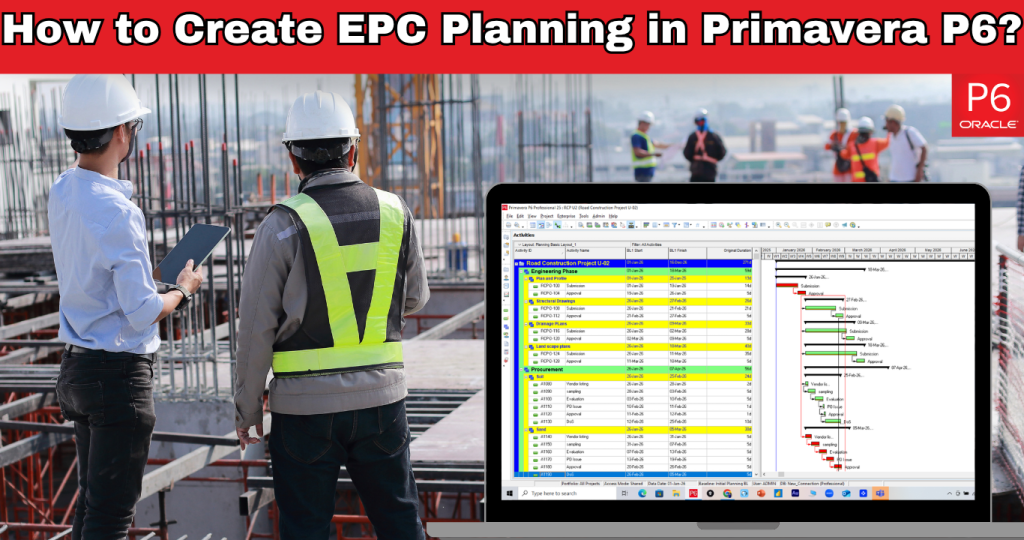
Planning an EPC (Engineering, Procurement, and Construction) project is a complex task that requires strategic coordination, accuracy, and efficient management. This is where Primavera P6 proves invaluable. Primavera P6 enables project managers to streamline workflows, allocate resources effectively, and maintain full visibility across all project phases.
In this guide, we’ll explore how to create comprehensive EPC planning in Primavera P6 that helps you achieve seamless execution and on-time, within-budget project delivery.
Why Set Up an Enterprise Project Structure (EPS) for EPC Planning?
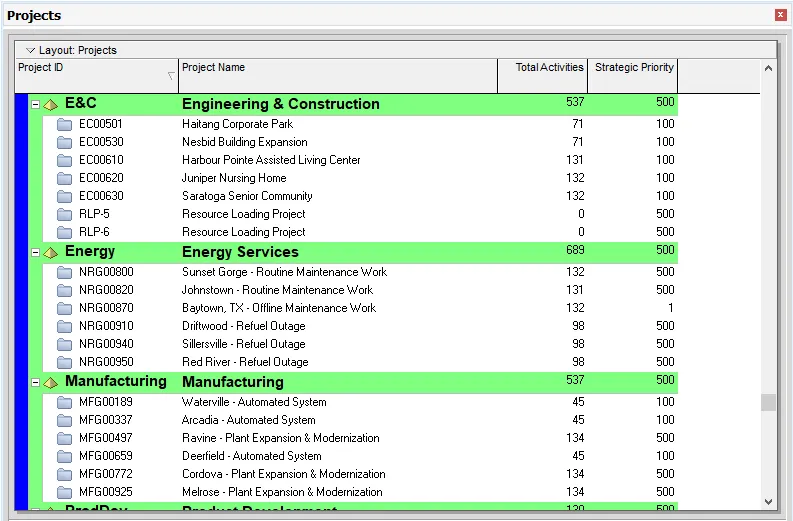
Before starting EPC planning in Primavera P6, setting up an Enterprise Project Structure (EPS) is essential. The EPS is a hierarchical framework that helps organize and manage multiple projects efficiently within your database. It is a structured folder system where each category represents a group of related projects, allowing smoother navigation and management.
Moreover, EPS may include categories like Engineering & Construction (E&C), Manufacturing, and Product Development. This organization makes locating and managing projects effectively during your EPC Planning in Primavera P6 process easy.
These EPS layers also appear on the project’s screen as colored bands, enabling you to add new projects directly under the appropriate category.
Source: https://www.taradigm.com/how-to-create-a-project-in-primavera-p6/
Step-by-Step Guide to Create EPC Planning in Primavera P6
Here’s a step-by-step guide to help you create EPC Planning in Primavera P6 efficiently and accurately:
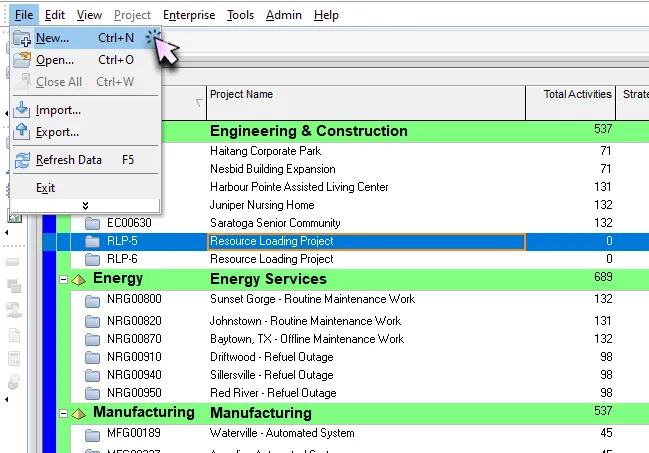
- Creating a New Project
Once your EPS is established, you can create new projects, an essential step in any EPC Planning in Primavera P6 workflow.
To create a project:
- Go to File > New, or
- Right-click within the Projects table and select Add.
Source: https://www.taradigm.com/how-to-create-a-project-in-primavera-p6/
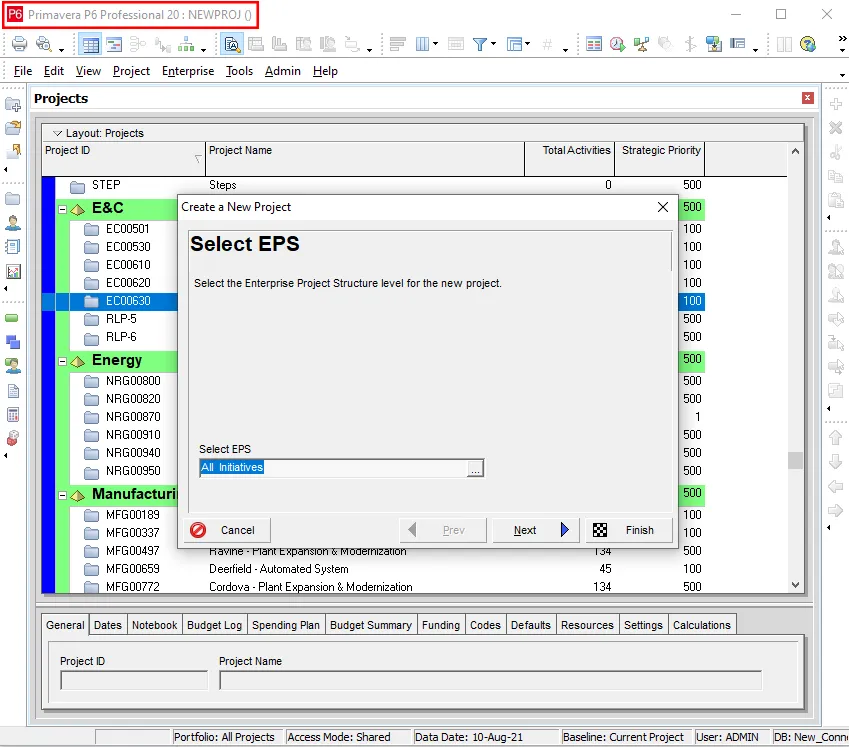
This opens the New Project Wizard, which will walk you through setting up your project’s key parameters. A new project with a default Project ID is created and displayed in the title bar when the wizard launches.
Source: https://www.taradigm.com/how-to-create-a-project-in-primavera-p6/
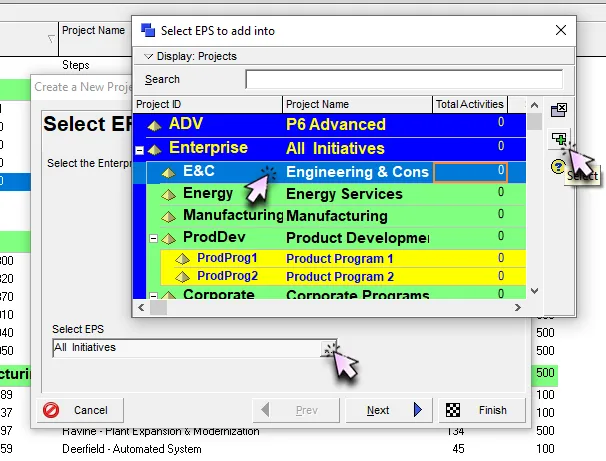
- Selecting an EPS Layer
The wizard’s first step is to choose which EPS layer your project will belong to.
By default, P6 places new projects under the All Initiatives layer. To change this, click the ellipsis (…) button to open the assignment window and select the relevant layer—for example, Engineering & Construction for a construction project.
Source: https://www.taradigm.com/how-to-create-a-project-in-primavera-p6/
After selecting your layer, click Assign, then Next to continue.
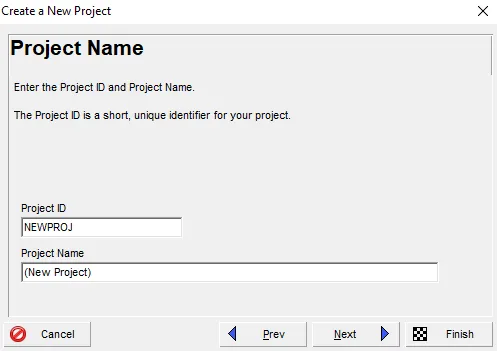
- Setting a Project ID and Name
Each project in your database requires a unique Project ID. If a duplicate ID is entered, P6 automatically adds “-1” to make it unique. A good practice is to use your job number, contract number, or accounting reference for consistency. The Project Name doesn’t need to be unique, but should be descriptive enough to identify the project at a glance.
Source: https://www.taradigm.com/how-to-create-a-project-in-primavera-p6/
Click Next when done.
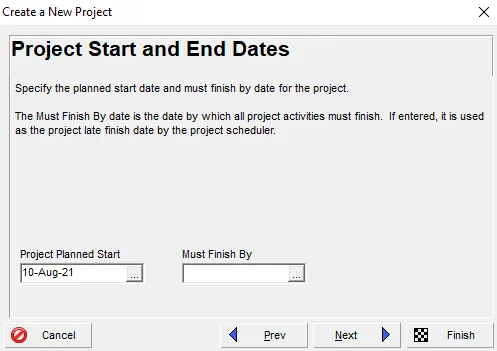
- Choosing Project Dates
Next, specify your Planned Start and Must Finish By dates.
By default, the start date is set to the day you create the project, but it can be modified manually or through the calendar tool. The Planned Start Date often represents the contract award date, not just the beginning of construction, as EPC Planning in Primavera P6 typically includes preconstruction and engineering activities.
For example:
- Planned Start: January 2nd
- Must Finish By: September 25th
Source: https://www.taradigm.com/how-to-create-a-project-in-primavera-p6/
The “Must Finish By” field is optional. It won’t restrict the project’s schedule, but it is a useful reference for tracking whether it is on time, early, or delayed. Click Next to proceed.
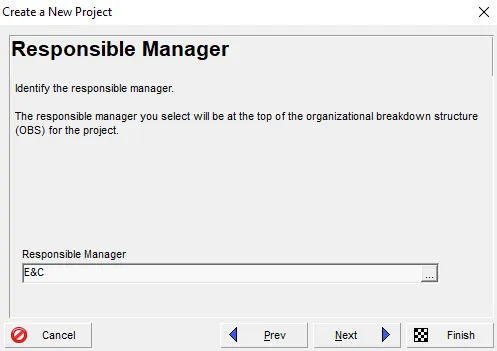
- Selecting a Responsible Manager
Now assign a Responsible Manager from the Organizational Breakdown Structure (OBS).
Source: https://www.taradigm.com/how-to-create-a-project-in-primavera-p6/
This defines who can access, edit, and control the project. Click the ellipsis (…) button, choose the appropriate manager, and press Assign. If unsure, leave the default setting as administrators can modify it later.
Source: https://www.taradigm.com/how-to-create-a-project-in-primavera-p6/
Click Next to continue.
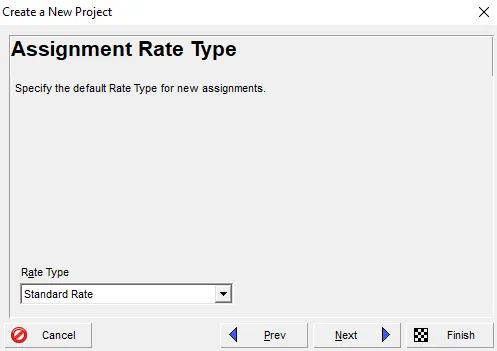
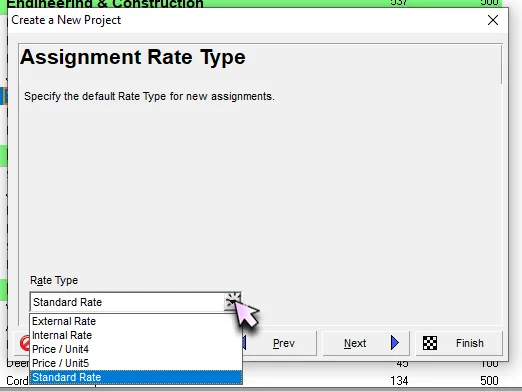
- Choosing a Rate Type
Next, assign a Rate Type, which determines the standard cost rates for any resources or roles linked to the project. These rates are predefined by your Primavera P6 database administrator.
Source: https://www.taradigm.com/how-to-create-a-project-in-primavera-p6/
For most EPC Planning in Primavera projects, you can use the default Standard Rate.
Source: https://www.taradigm.com/how-to-create-a-project-in-primavera-p6/
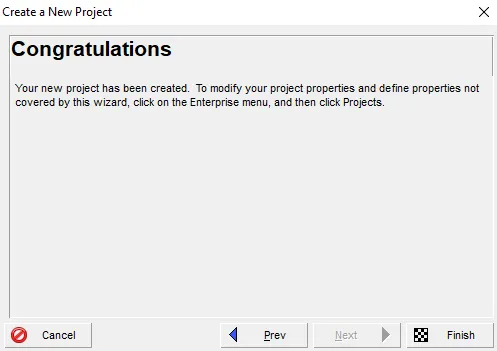
Click Next, then Finish to complete the project setup.
Source: https://www.taradigm.com/how-to-create-a-project-in-primavera-p6/
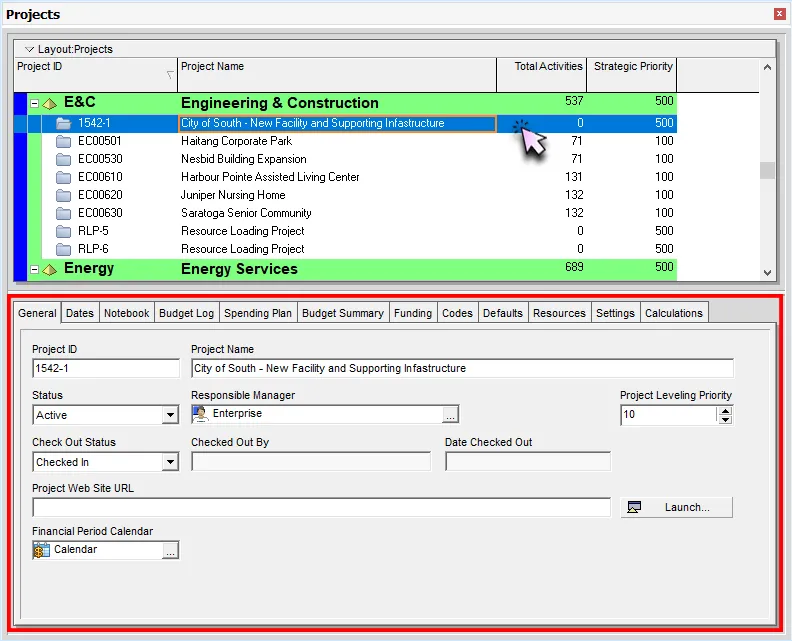
- Adjusting Project Information
Once created, your project appears in the Projects List under its designated EPS layer. Selecting the project lets you view or edit its details in the Project Details section.
You can modify project metadata such as IDs, names, responsible managers, or key dates. Even after project execution begins, Primavera allows you to fine-tune information to ensure your data stays accurate and aligned with the latest project developments.
For professionals aiming to master these configurations, earning a Primavera P6 Certification can significantly enhance your expertise in project management, scheduling, and enterprise-level planning.
Source: https://www.taradigm.com/how-to-create-a-project-in-primavera-p6/
Conclusion
Setting up an EPS is the foundation of effective EPC Planning in Primavera P6. By carefully defining EPS layers, assigning project IDs, setting key dates, and choosing responsible managers, you create a structured workflow that supports better control and visibility across all projects.
