In Primavera P6, activities are the building blocks of any project schedule. They represent the individual tasks that need to be planned, executed, and tracked to ensure project success. Whether you’re managing a construction project, an engineering deliverable, or a shutdown plan, adding activities accurately is essential for creating a realistic and reliable schedule.
If you’re just getting started with Primavera P6, learning how to add activities is one of the first and most important steps. It’s not just about inserting a task — it’s about placing it in the right WBS level, assigning the correct duration, and selecting the right activity type to reflect how the work will be performed.
In this guide, we’ll walk you through the step-by-step process to add an activity in Primavera P6, explain the different activity types, and share tips to help you structure your schedule more effectively.
Watch Video Instead
Watch our detailed video tutorial on How to Add Activities in Primavera P6
When building out your schedule in Primavera P6, it’s not just about entering activities — it’s about entering them with purpose. Every activity you add contributes to the logic of your project, drives durations, and directly impacts how progress and delays are measured. That’s why it’s important to consider how each task fits within your WBS, how it connects to predecessors and successors, and whether it needs resources or constraints. Investing a few extra minutes at this stage can save hours later during schedule updates, reporting, and stakeholder reviews — ensuring your project stays aligned with both plan and reality.
Step-by-Step: How to Add an Activity in Primavera P6
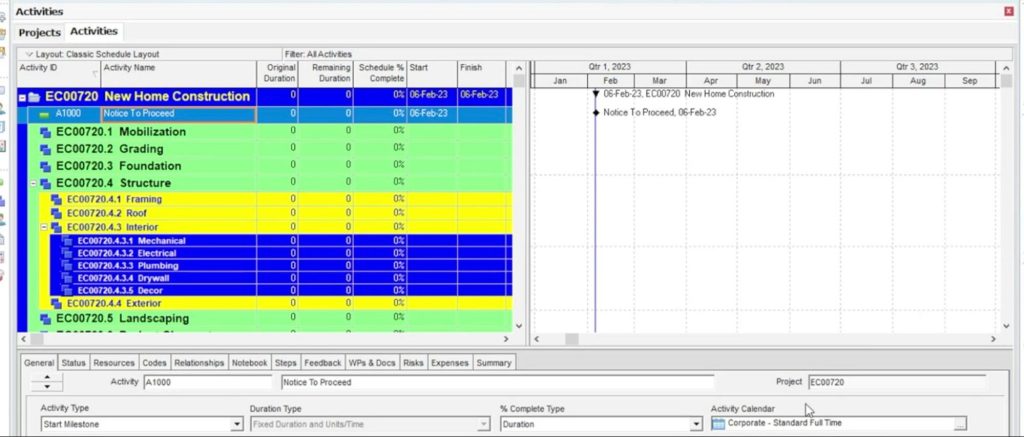
When you open the Activities window in Primavera P6, you’ll see a familiar three-part layout:
- On the far left, the Activity Table, where WBS (Work Breakdown Structure) elements and activities are listed
- In the center, the Gantt chart view, which visualizes task durations and dependencies
- At the bottom, the Activity Details pane, where you can configure information like resources, predecessors, constraints, and more
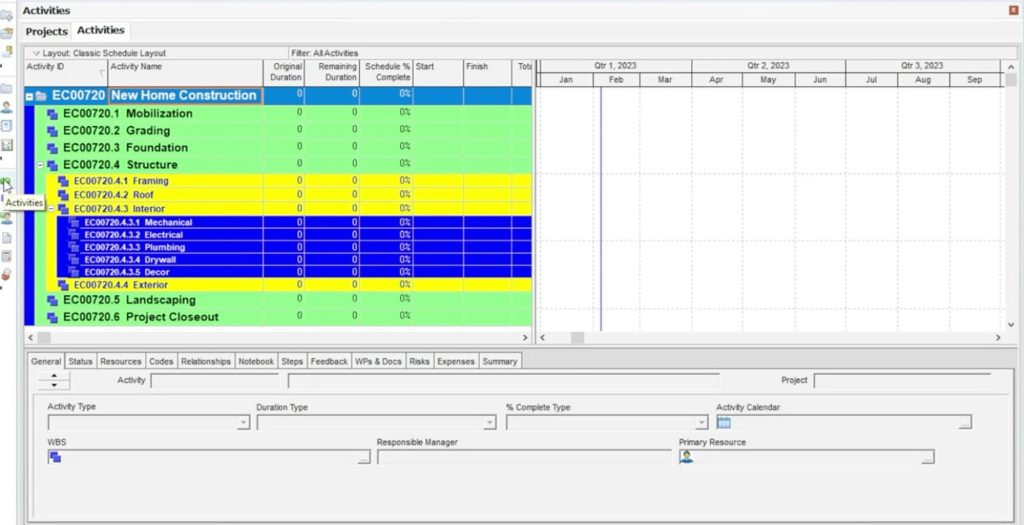
In the Activity Table, WBS elements appear as color-coded rows, each color representing a different hierarchical level. This makes it easier to identify structure and organize your schedule.
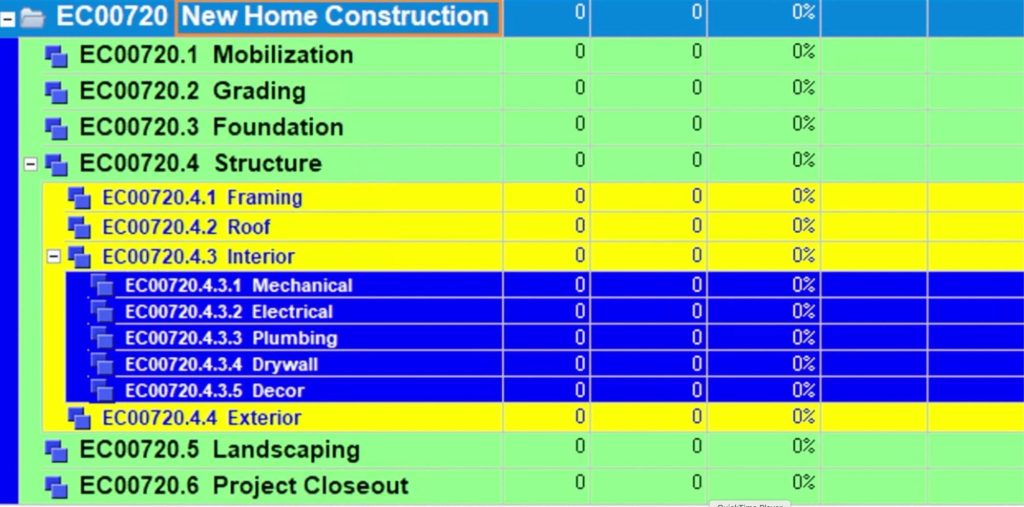
To start adding tasks, you’ll first select the WBS element under which the activity will be created. In this example, we’re placing our first activity directly below the top-level WBS called “New Home Construction.”
Option 1: Add an Activity Using the Wizard
- Select the WBS element (e.g., “New Home Construction”)
- Click the Activities button to the right of the Gantt chart

This launches the New Activity Wizard, a step-by-step dialog box that guides you through the process of creating your activity.
Step 1: Activity ID and Name
Primavera will auto-generate an Activity ID. You can leave this as is or edit it to match your naming system.
In the Activity Name field, type a descriptive title — for example, “Notice to Proceed.”
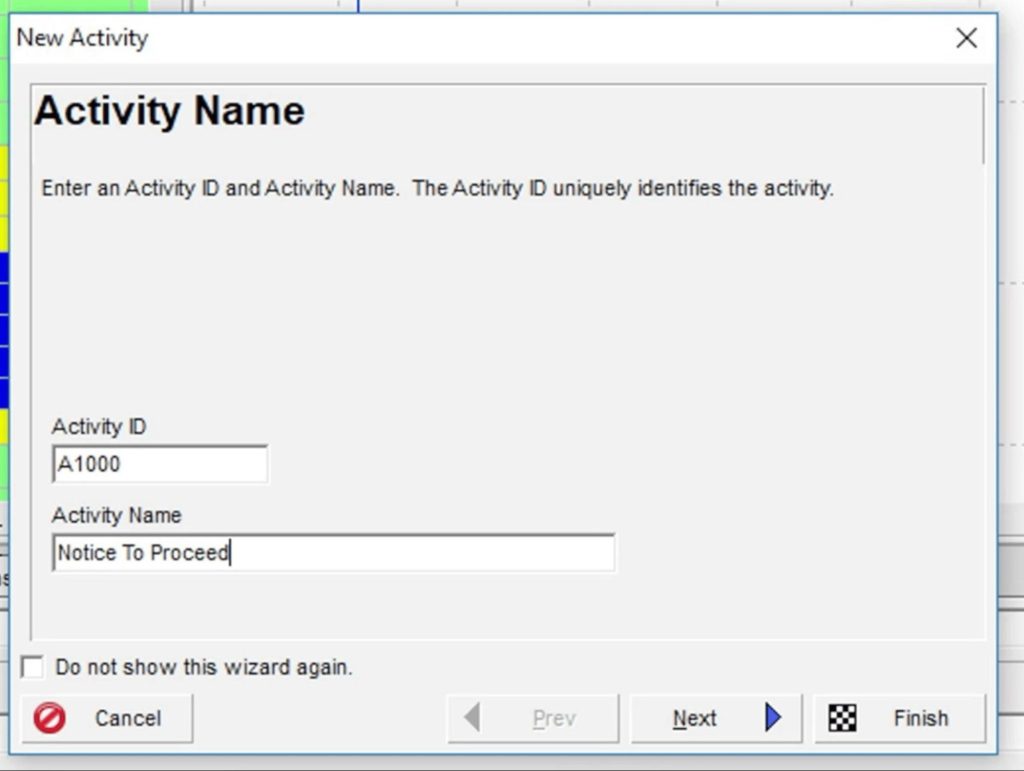
Click Next.
Step 2: Confirm WBS Assignment
The WBS element should already be selected based on your previous step. If needed, you can change it by clicking the ellipsis (…) and selecting another WBS node.

Click Next.
Step 3: Choose the Activity Type
By default, Primavera sets the Activity Type to “Task Dependent.”
For this example, we’re creating a Start Milestone, so select that from the dropdown menu.
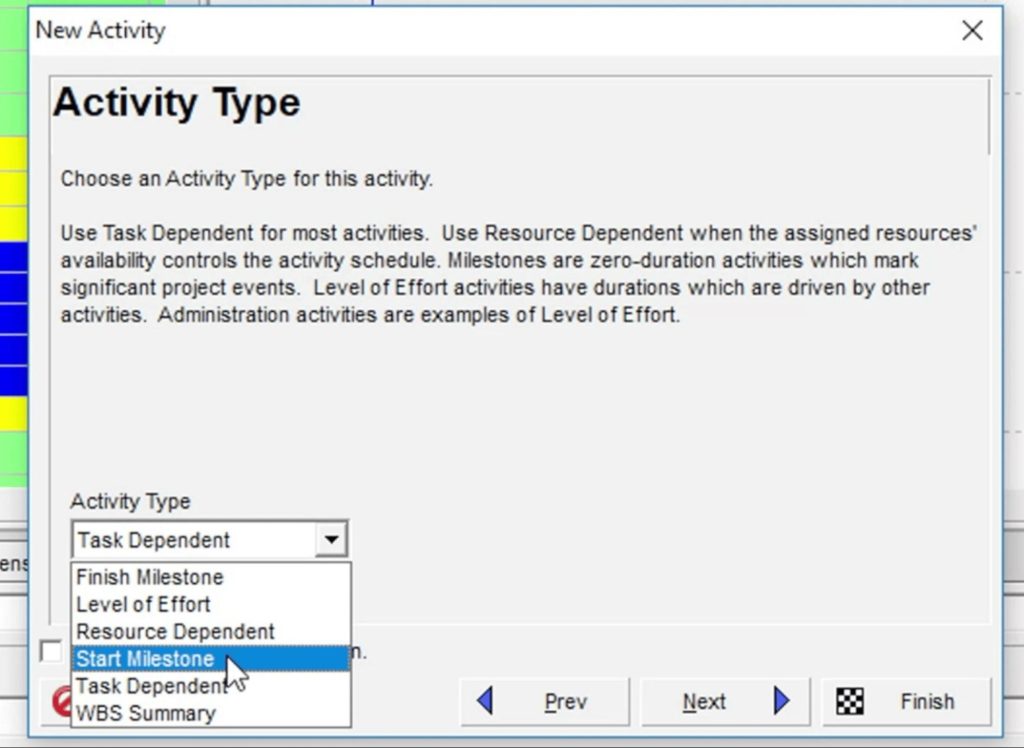
Click Next.
Step 4: Skip Relationships for Now
The wizard will prompt you to define predecessors or successors. Since this is the first activity, no relationships are needed yet.
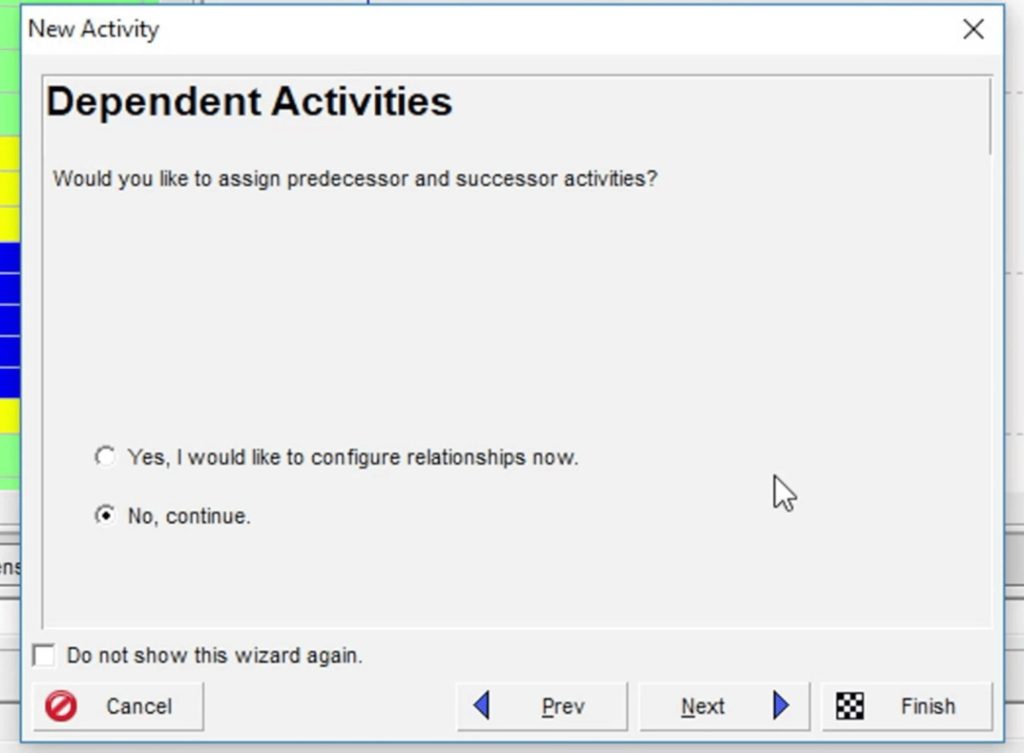
Click Next.
Step 5: Additional Details (Optional)
Here, you can attach documents, assign activity codes, or enter expenses — but for a Start Milestone, this isn’t necessary.
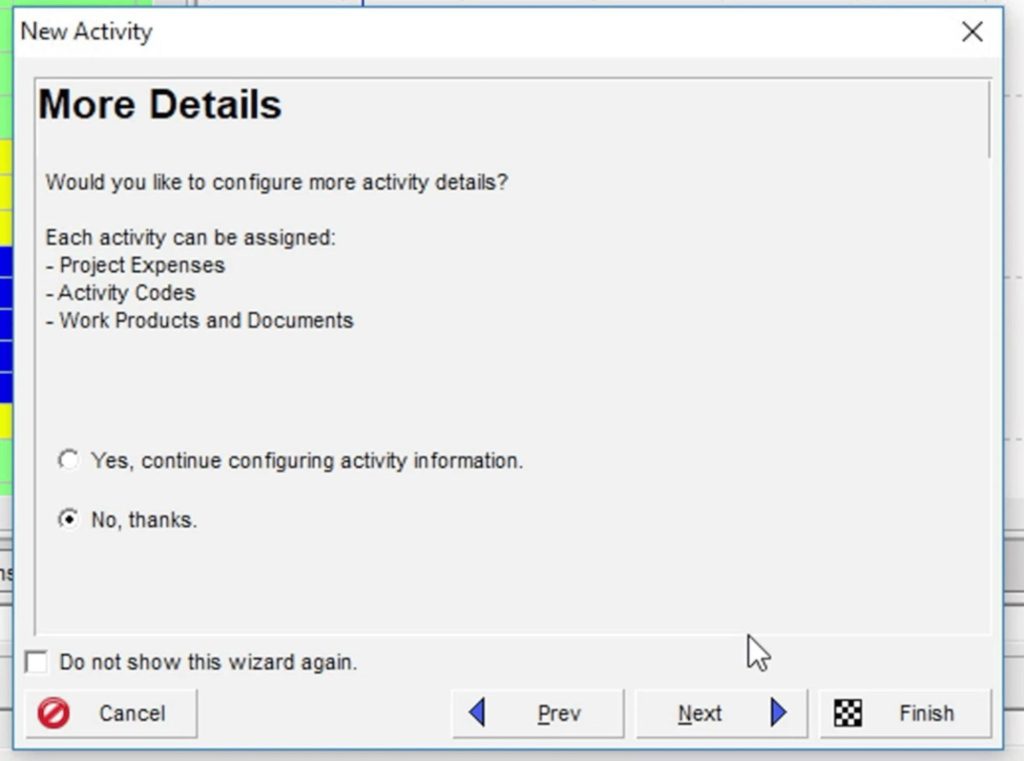
Click Next.
Step 6: Finish the Wizard
You’ll see a confirmation screen. Click Finish to add the activity to your schedule.
The new activity will appear both in the Activity Table and on the Gantt chart as a milestone marker.
Ready to master Primavera P6?
Option 2: Add Activities Directly in the Activity Table
If you prefer a quicker, manual method, you can add activities directly within the Activity Table, bypassing the wizard.
Let’s continue with the same example. In the Activities view, we’ll insert a new task right below the one we just created — “Notice to Proceed.”
- Right-click on the activity row (Notice to Proceed)
- In the pop-up menu, scroll down and click Add
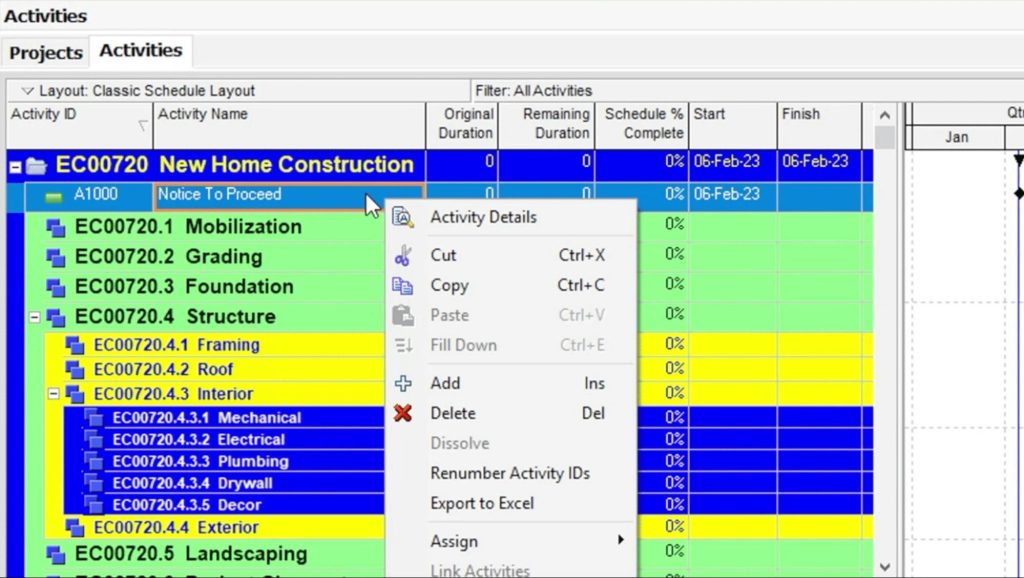
A new activity row will appear directly beneath it. Primavera P6 will automatically generate an Activity ID. You can now name the activity — for example, enter “Project Start.”
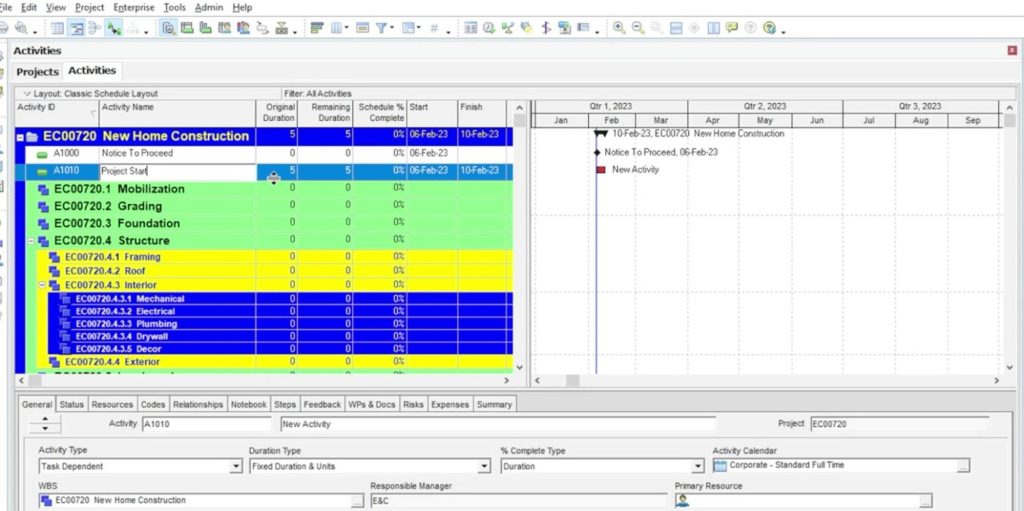
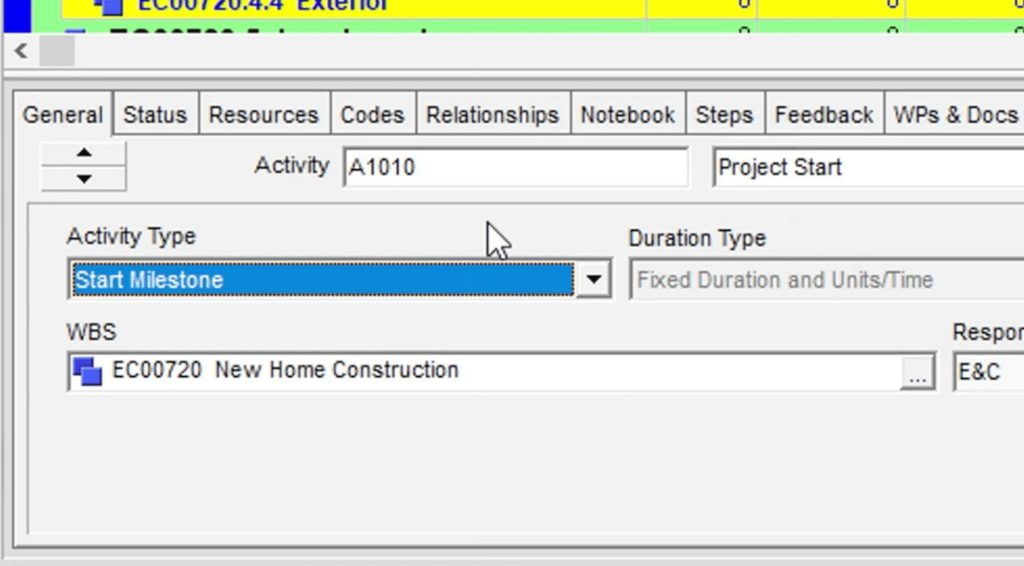
Since this new task is also a Start Milestone, navigate to the General tab in the bottom Details pane.
Change the Activity Type from the default Task Dependent to Start Milestone using the dropdown menu.
This method is ideal for users comfortable with the layout and looking to add multiple activities efficiently without stepping through the wizard each time.
Conclusion
Mastering how to add activities in Primavera P6 is an essential skill for any planner or scheduler working with project controls. Whether you’re building a construction timeline, planning a shutdown, or managing an engineering deliverable, your activities form the core of the project’s logic and progress tracking.
In this guide, we covered two practical methods for adding activities — one using the guided Activity Wizard and the other via direct input in the Activity Table. We also explored how to properly assign WBS elements and activity types to ensure your schedule stays clean, accurate, and easy to manage.
By applying these steps consistently, you lay the groundwork for reliable dependencies, resource assignments, and performance tracking — all of which are critical to successful project execution in Primavera P6.
Want to Go Deeper?
Watch our in-depth Primavera P6 webinar to learn about this project management tool.