Primavera P6 software is one of the most powerful project management tools used across industries like construction, engineering, IT, and manufacturing. Designed by Oracle, it helps professionals plan, schedule, and control large-scale projects with efficiency. With over 100,000 companies worldwide using Primavera P6 software, it has become a standard for managing complex projects while ensuring timely delivery and cost control. However, before diving into project execution, it’s crucial to configure the basic settings to align the software with your project’s needs.
In this guide, we’ll walk you through the essential Primavera P6 software setting. We’ll help you understand how to navigate the set up customized settings as per your project’s need. By the end of this guide, you’ll have a solid foundation to set up Primavera P6 software for seamless project planning and execution.
Why is it Important to Understand Primavera P6 Software Basic Settings Before Starting a Project?
Understanding the basic settings of Primavera P6 software is crucial for several reasons. First, it ensures that the software is customized to meet the specific needs of your projects, allowing for more accurate scheduling, resource allocation, and tracking. Second, properly setting up your Admin settings, calendars, and project structures from the start minimizes the risk of errors and confusion later in the project lifecycle.
By taking the time to configure the software correctly, you can enhance collaboration, improve data accuracy, and ultimately drive better project outcomes. Whether you’re managing a single project or a portfolio, having a solid grasp of these fundamental settings enables you to work more efficiently and ensure that all aspects of the project are aligned for success.
Key Features of Primavera P6 Software Basic Settings
To ensure successful project management in Primavera P6, it’s crucial to configure the software’s basic settings correctly from the beginning. These settings serve as the foundation for scheduling, resource management, and reporting, helping you align the tool with your specific project needs.
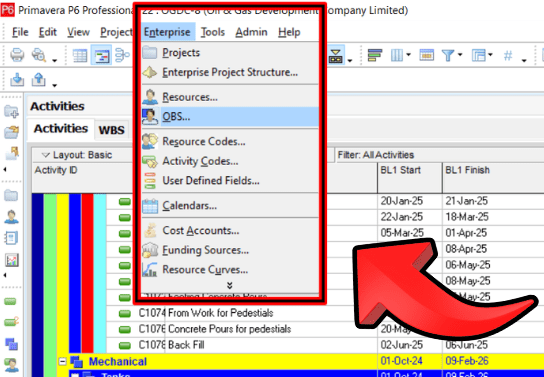
Primavera P6 Software Admin Settings
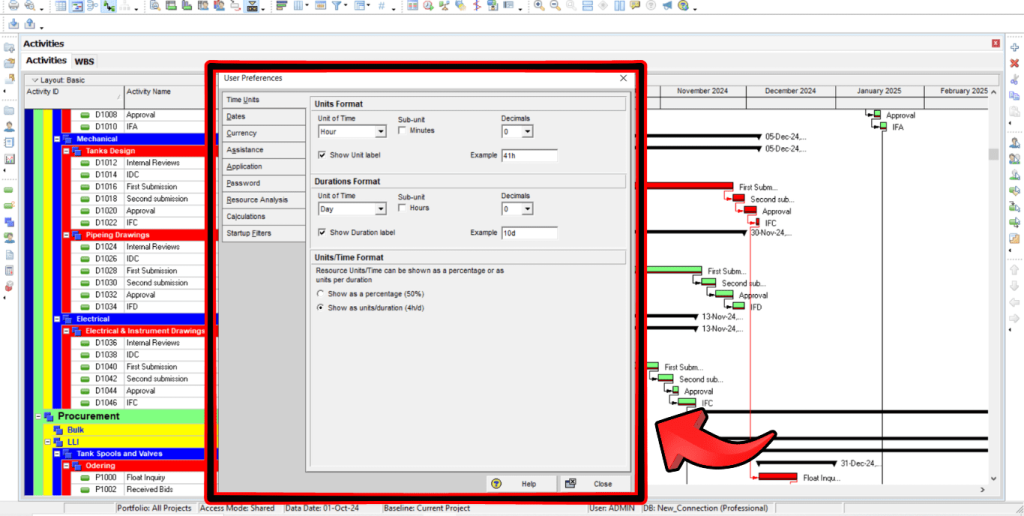
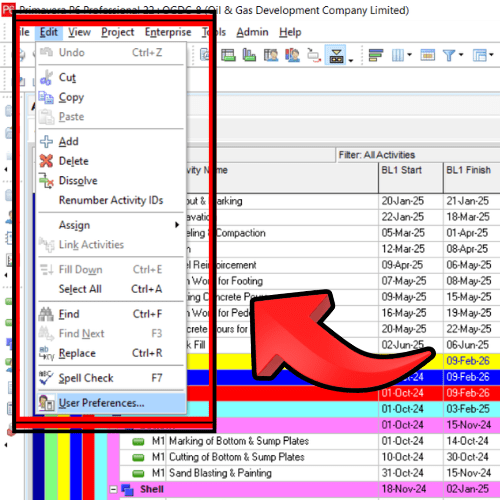
Before starting a project in Primavera P6 software, it’s important to configure the Admin Settings to ensure smooth project management. These settings define user access, security, and system preferences.
- User Preferences: Adjust general settings like date format, currency, time units.

- User Access & Security: Assign roles and permissions to team members to control who can view or edit project data.
- Database Settings: Configure database connections to ensure project data is stored securely and is accessible when needed.
Setting up admin preferences correctly helps streamline project workflows and prevents unauthorized changes to critical project data.
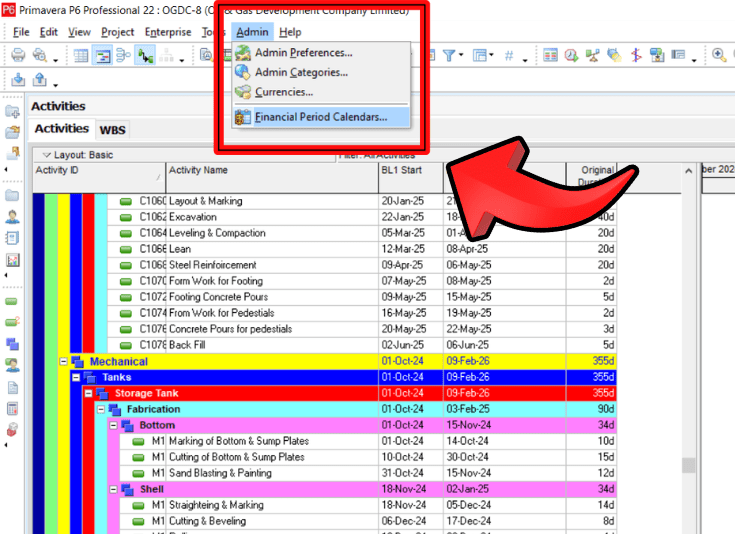
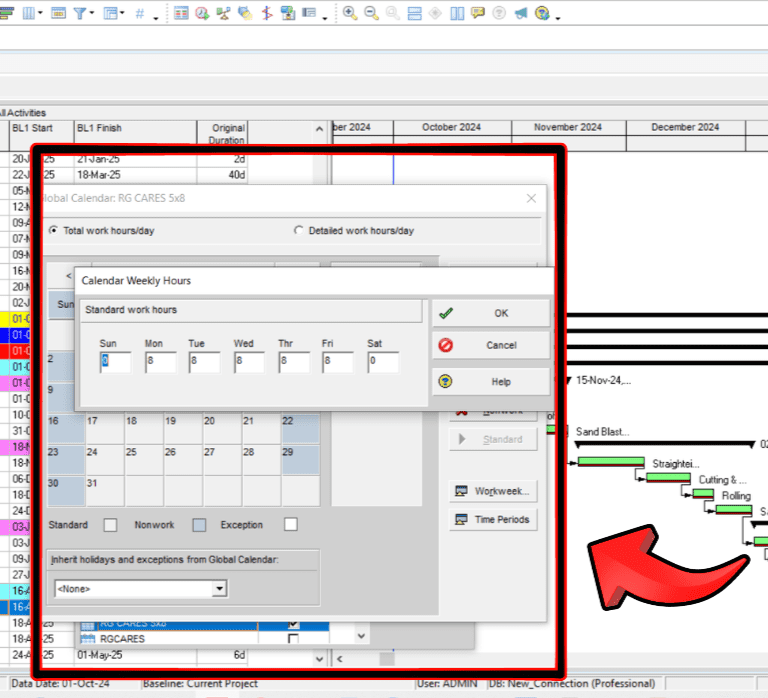
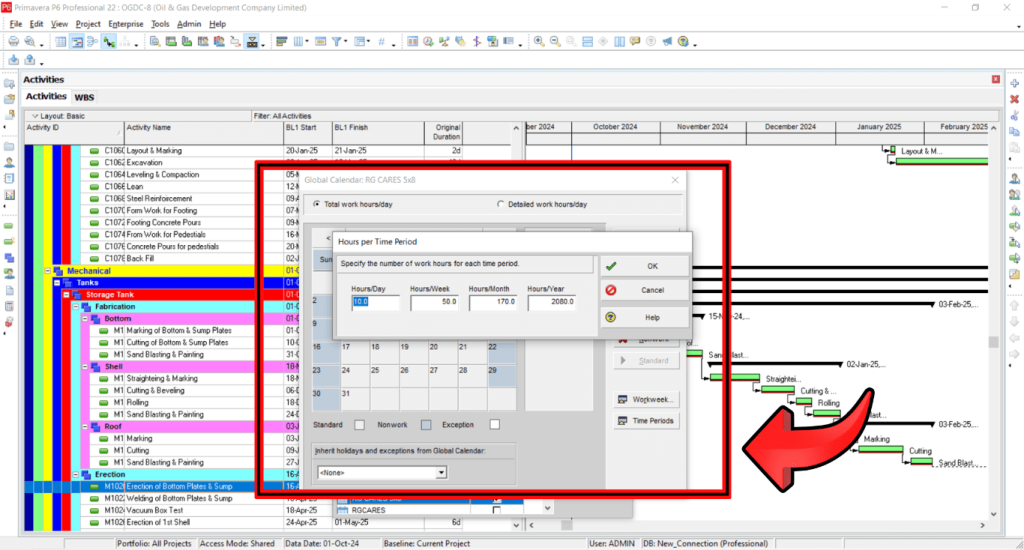
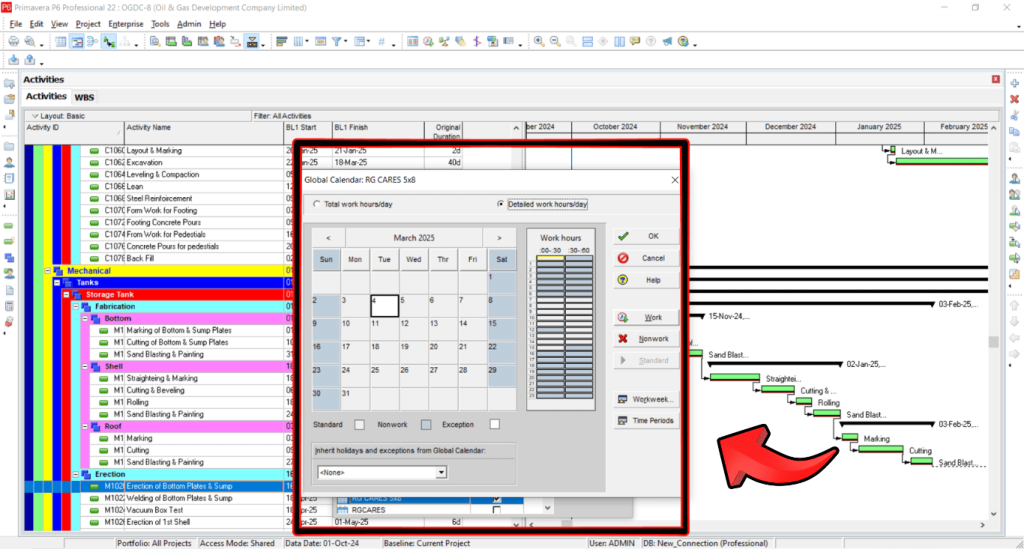
Calendar Settings
Calendars in Primavera P6 software define the working days and hours for a project, ensuring accurate scheduling. Primavera P6 allows you to set up different types of calendars:
- Global Calendar: Used across multiple projects with a standard work schedule.
- Project Calendar: Specific to a single project, allowing for customized workdays and shifts.
- Resource Calendar: Assigned to individual resources, reflecting their availability and work hours.
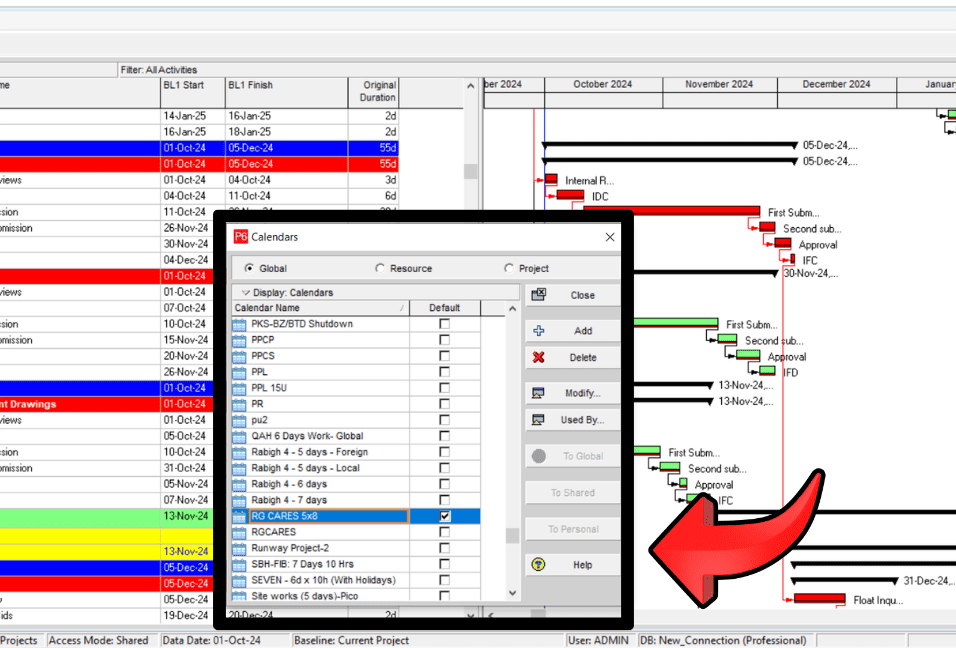
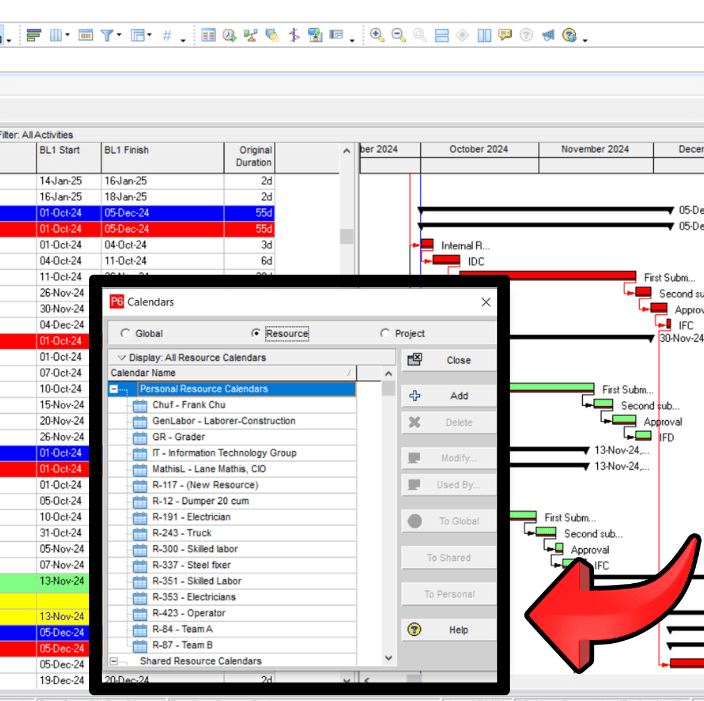
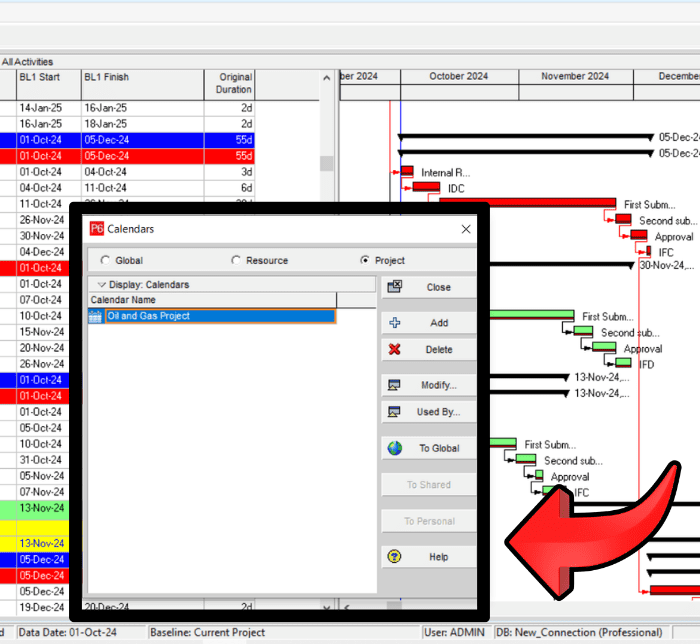
When configuring a calendar, you can define workweeks, holidays, and exceptions to match real-world schedules. Choosing the right calendar ensures accurate activity durations and prevents scheduling conflicts.
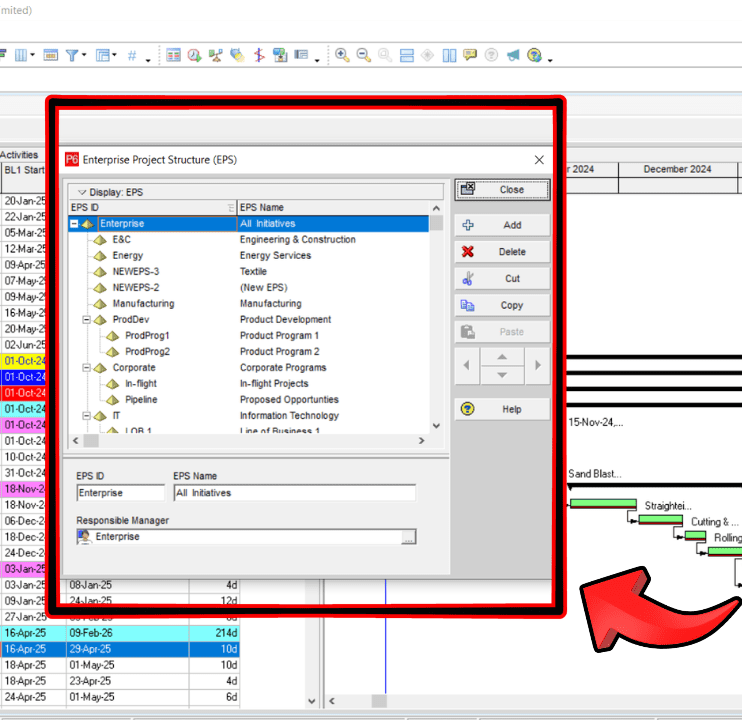
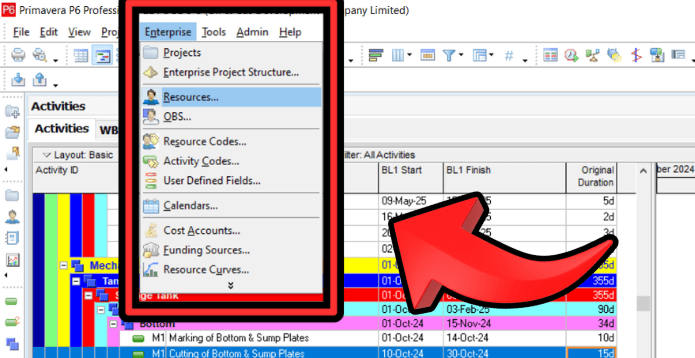
Primavera P6 Software Enterprise Project Structure (EPS)
The Enterprise Project Structure (EPS) in Primavera P6 is a hierarchical framework used to organize and manage multiple projects efficiently. It allows users to categorize projects based on departments, locations, clients, or any other relevant classification.
Key aspects of EPS setup:
- Defining the EPS Hierarchy: Create multiple levels to organize projects based on company structure.
- Assigning User Access: Restrict or grant access to specific projects within the EPS.
- Managing Large-Scale Projects: Helps in tracking progress and performance across multiple projects within an organization.
Setting up EPS correctly ensures a clear structure, making project management more efficient and scalable.
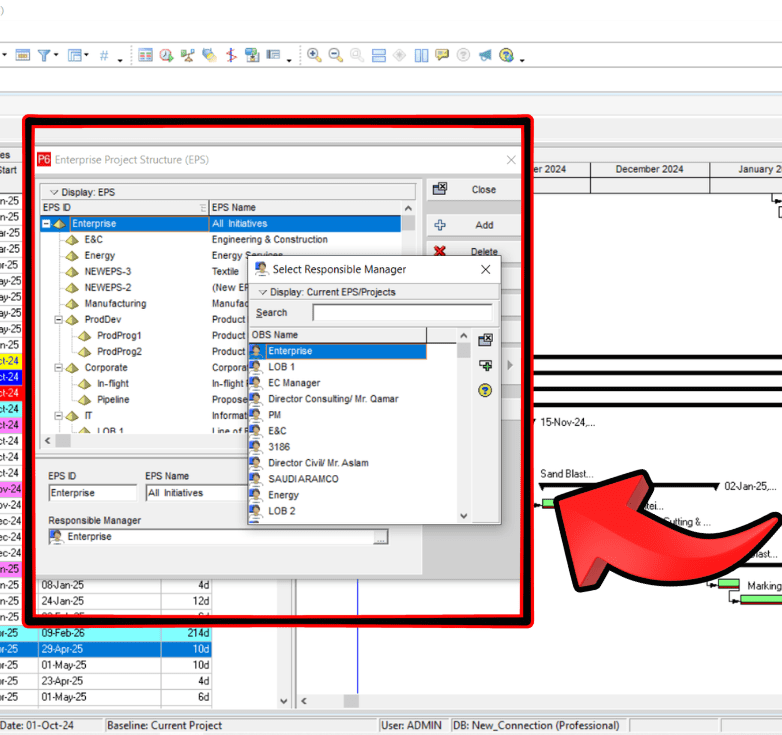
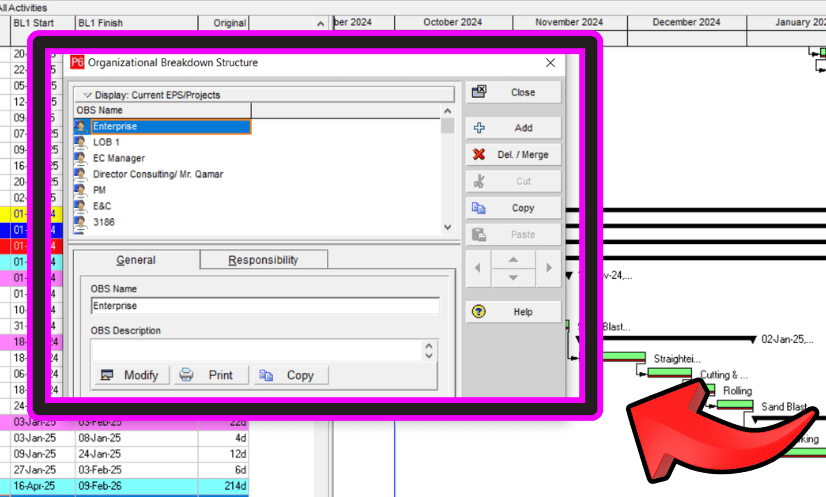
Organizational Breakdown Structure (OBS)
The Organizational Breakdown Structure (OBS) defines the roles and responsibilities of individuals managing projects in Primavera P6 software. Unlike EPS, which organizes projects, OBS focuses on people and their project-related responsibilities.
Key aspects of OBS:
- Assigning Project Managers: OBS links responsible individuals to specific projects or EPS levels.
- Defining Project Access Rights: Ensures that only authorized users can modify or manage certain projects.
- Customizing Based on Organizational Needs: OBS can be structured according to departments, job roles, or project teams.
A well-structured OBS ensures clear accountability, making it easier to track project ownership and streamline communication.
Project Dashboard
The Project Dashboard in Primavera P6 provides an overview of key project details, helping users monitor progress, track milestones, and identify potential issues. It serves as a central hub for project managers to access real-time project data.
Key components of the dashboard:
- Project Summary: Displays essential details such as project start and finish dates, budget, and status.
- Milestone Tracking: Highlights critical project milestones and deadlines.
- Performance Metrics: Shows earned value analysis, cost performance, and schedule performance indicators.
A well-configured dashboard ensures quick access to crucial project insights, helping project managers make informed decisions.
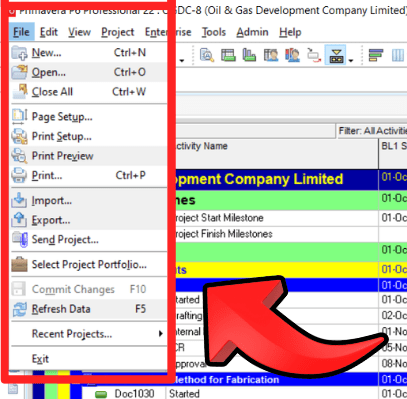
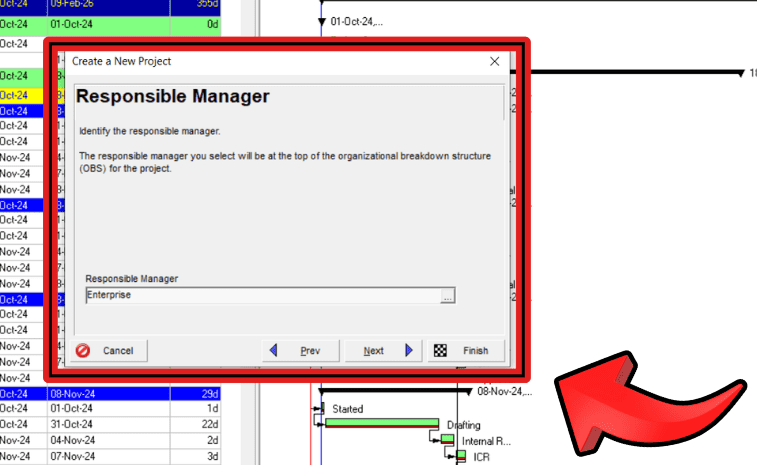
Creating a New Project
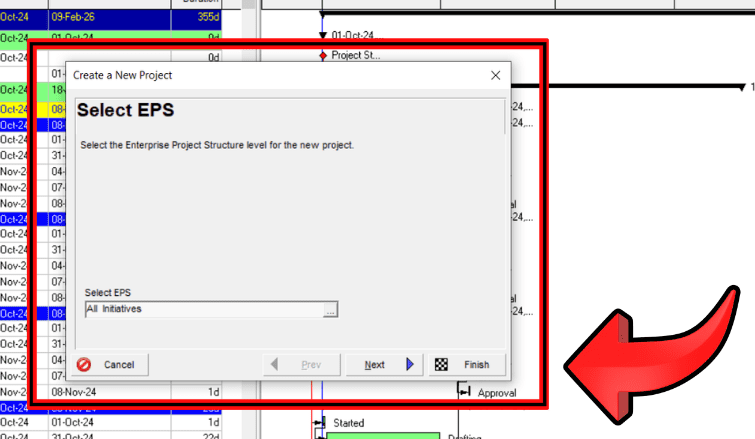
To start working in Primavera P6 software, you first need to create a project and define its basic parameters. Here’s a step-by-step process:
- Go to the Projects Tab: Click on “File” > “New” to start a new project.
2. Select EPS Location: Choose where the project will be placed within the Enterprise Project Structure (EPS )
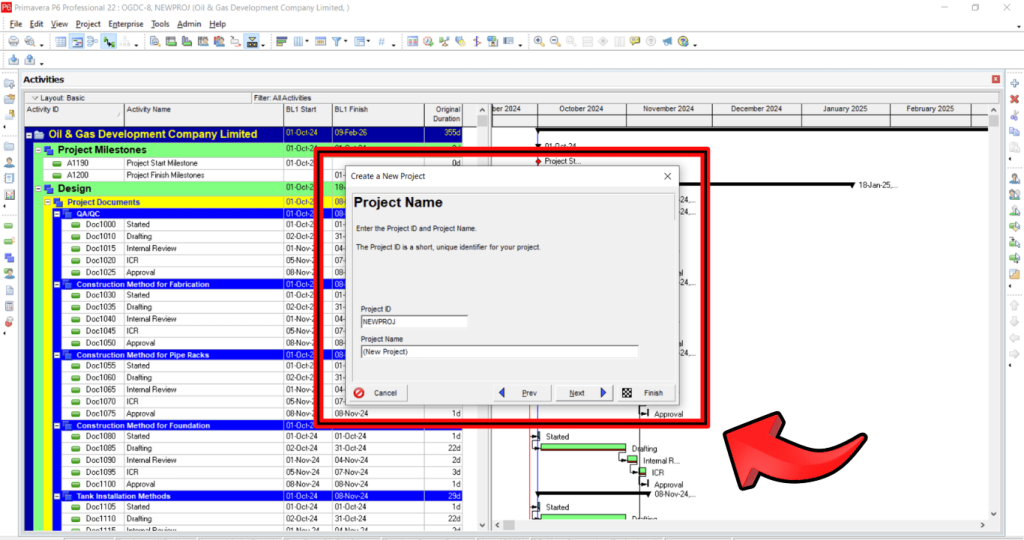
3. Project ID & NAME :
4. Set Start & Finish Dates: Define the project timeline to establish a baseline schedule.
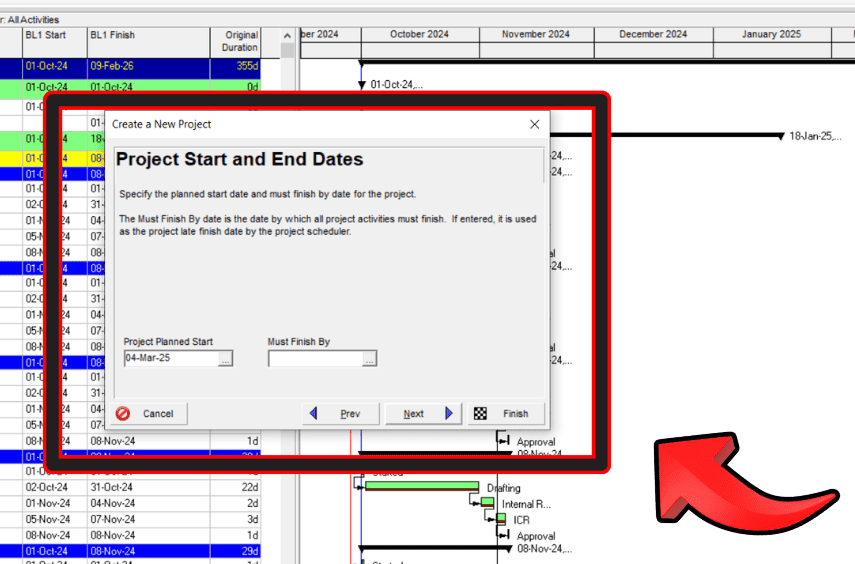
5. Responsible Manager : Select a global, project-specific, or resource calendar to ensure accurate scheduling.
6. Standard Rate:
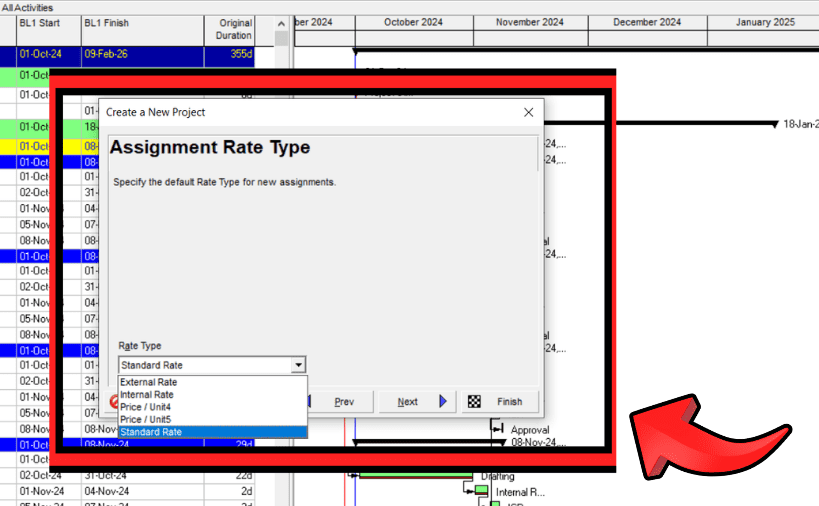
7. Once the project is created, it serves as the foundation for adding WBS , activities, resources, and dependencies. Proper setup ensures smooth project execution and tracking.
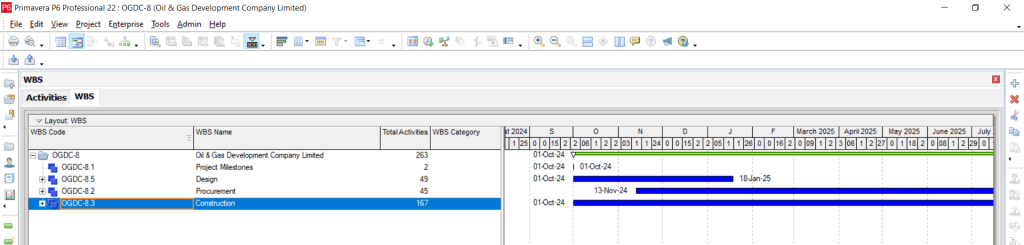
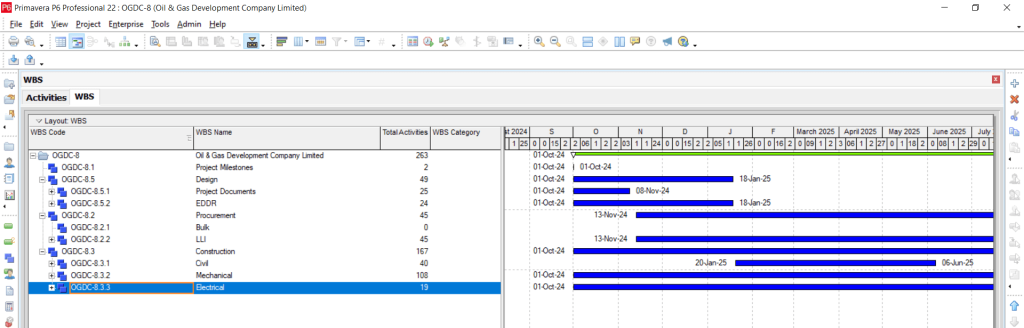
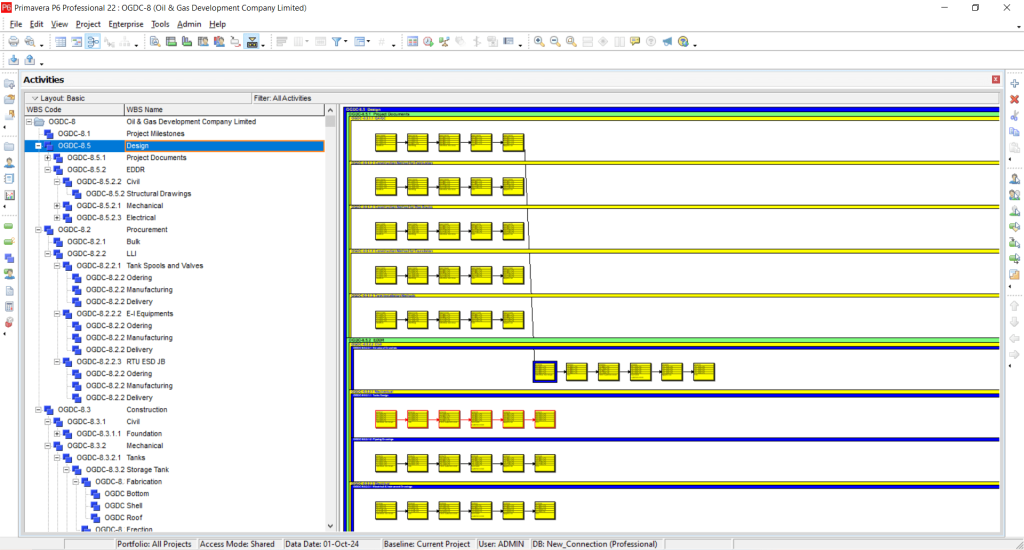
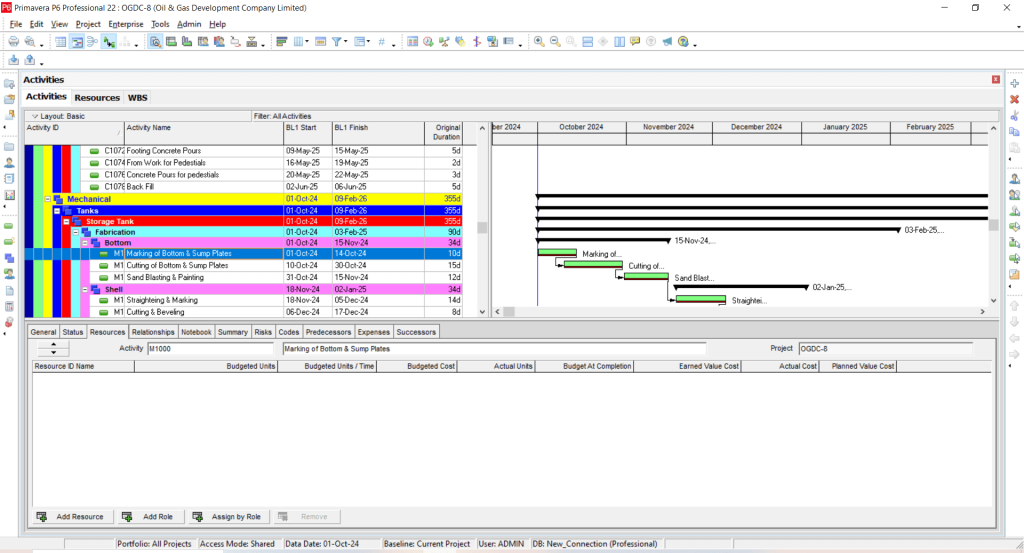
Work Breakdown Structure (WBS)
The Work Breakdown Structure (WBS) in Primavera P6 organizes the project into a hierarchical structure, breaking it down into manageable sections. This helps in structuring the project for better tracking and execution.
Click Project and Then click WBS from Dropdown window
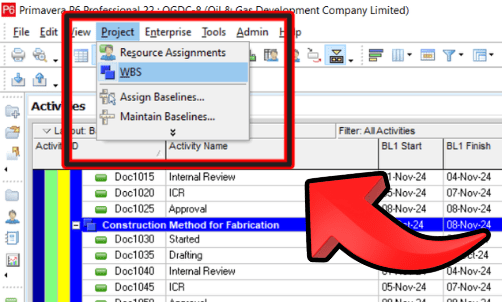
Key aspects of WBS:
- Hierarchical Organization: Projects are divided into phases, deliverables, and tasks, making large projects easier to manage.
Level-01 WBS
WBS have many Levels
Top WBS level is called Control Account
Lowest Level of WBS is Work Package
Planning Package is all WBS levels which are in between Control Account and Work Package
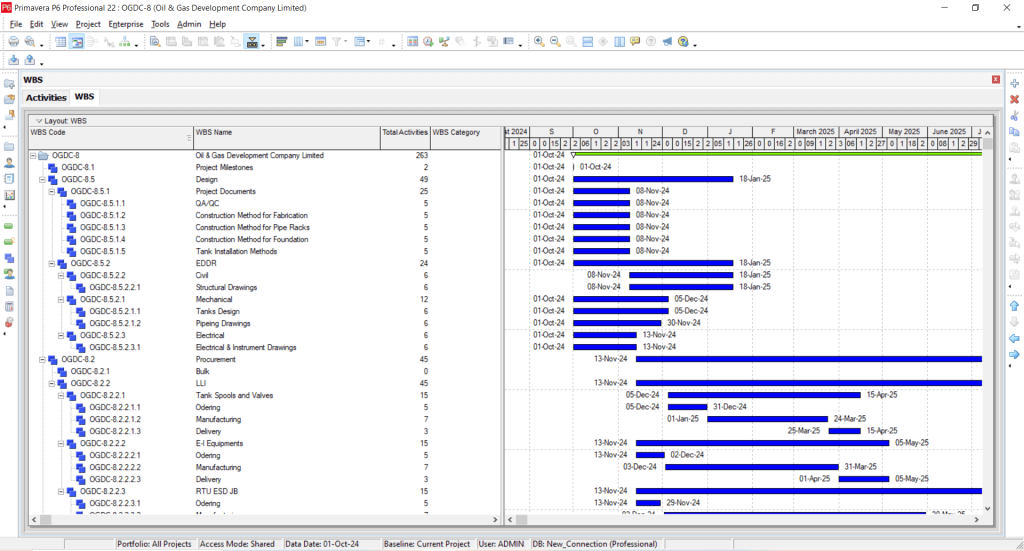
A well-defined WBS ensures better project visibility and helps teams stay organized throughout the project lifecycle.
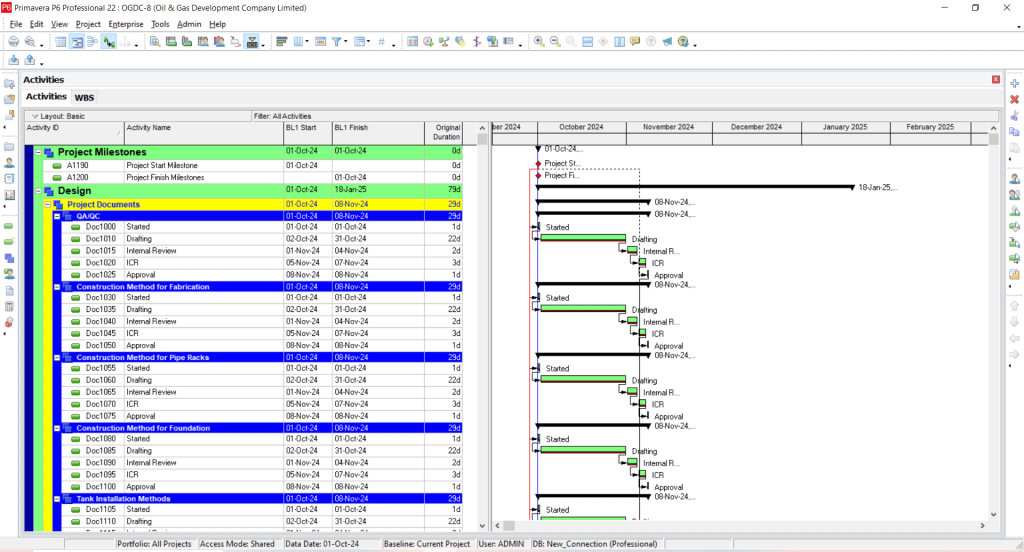
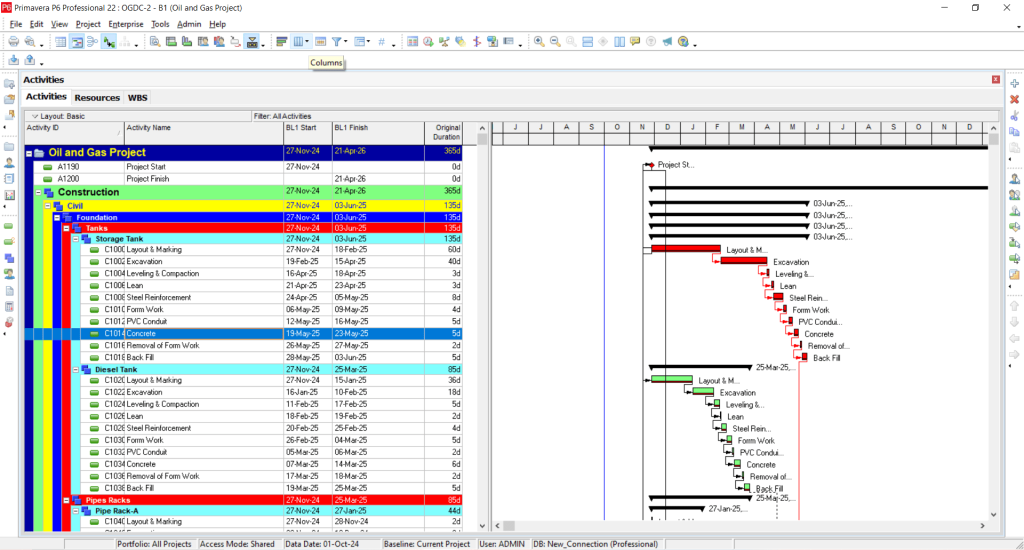
Dashboard Views in Primavera P6 Software (Gantt Chart & Network Diagram)
Primavera P6 provides different dashboard views to help users visualize project schedules and dependencies. The two most commonly used views are:
- Gantt Chart: A bar chart that represents project activities along a timeline. It shows task durations, dependencies, and progress
- Network Diagram: A flowchart-style view that displays the logical relationships between activities. It helps in analyzing the sequence of tasks and identifying the critical path.
By switching between these views, users can track project schedules efficiently and make necessary adjustments to keep the project on track.
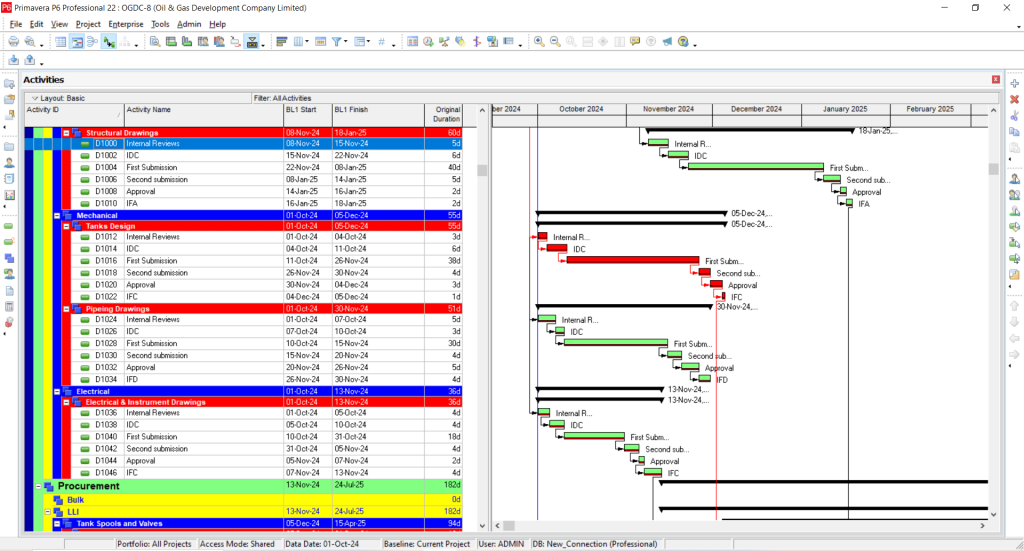
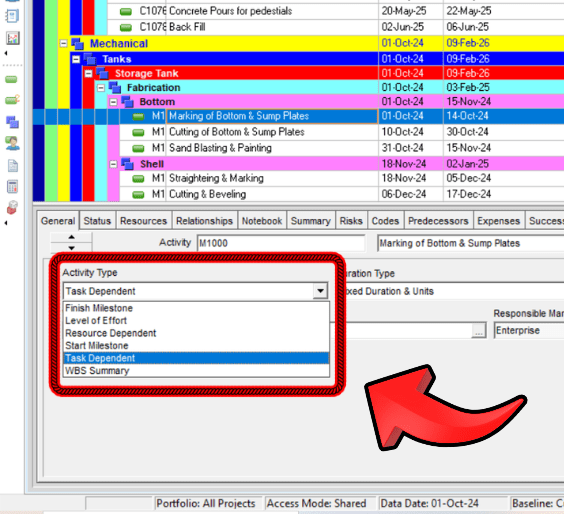
Activity Details
In Primavera P6, activities represent the individual tasks that make up a project. Configuring activity details correctly is essential for accurate scheduling and tracking.
Key elements of activity details:
Activity ID & Name: Each task is assigned a unique ID and descriptive name.
- Activity Type: Defines the type of task (e.g., task-dependent, milestone, resource-dependent).
- Relationships: Establishes dependencies between activities (Finish-to-Start, Start-to-Start, etc.).
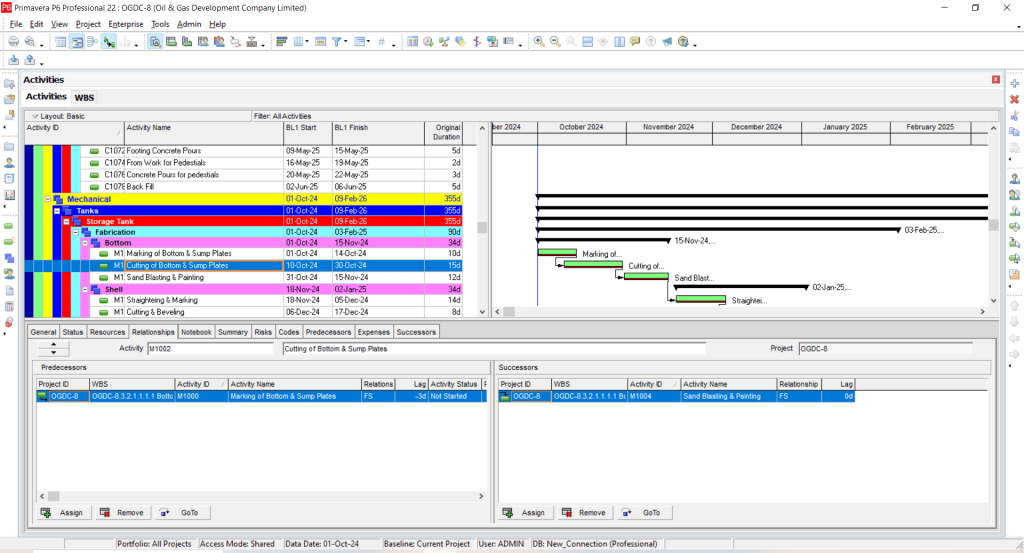
- Duration & Constraints: Specifies how long an activity will take and any constraints that affect scheduling.
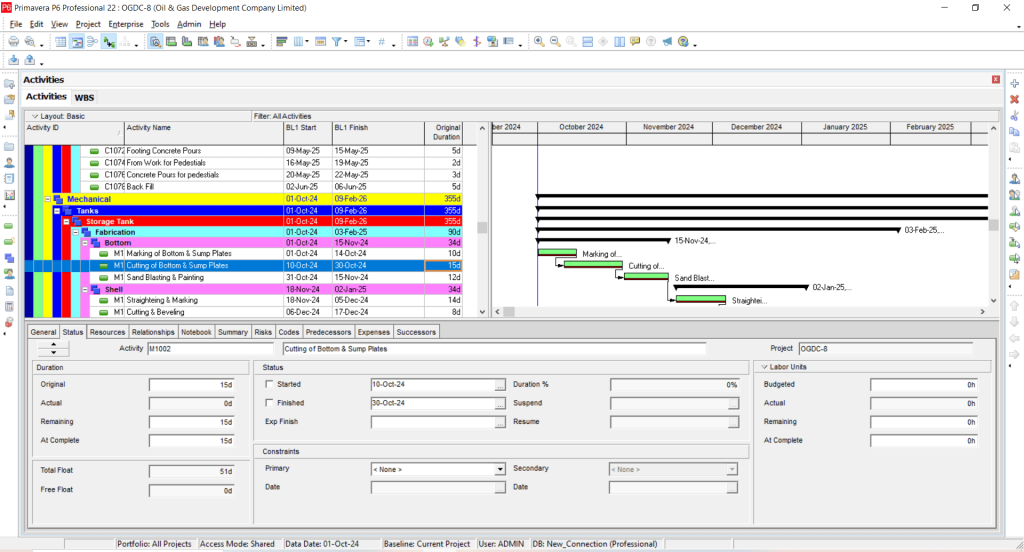
Entering accurate activity details ensures better project planning, helping teams stay on schedule and meet project deadlines.
Resource Window in Primavera P6
The Resource Window in Primavera P6 software is used to manage labor, material, and equipment resources for a project. Proper resource allocation is essential to prevent bottlenecks and cost overruns.
Key functionalities of the Resource Window:
- Adding & Defining Resources: Users can create and categorize labor, non-labor, and material resources with cost rates.
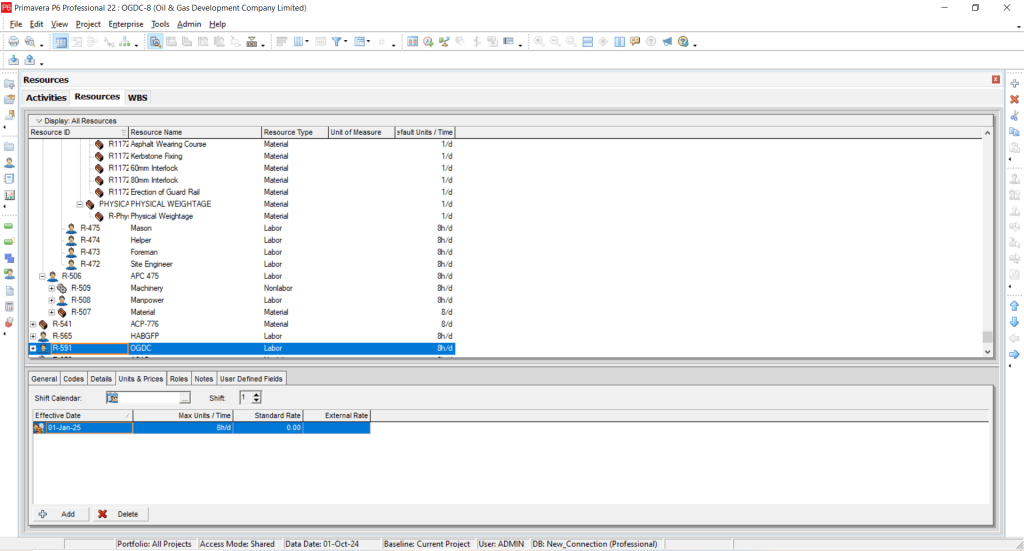
- Assigning Resources to Activities: Resources are linked to tasks to determine workload distribution.
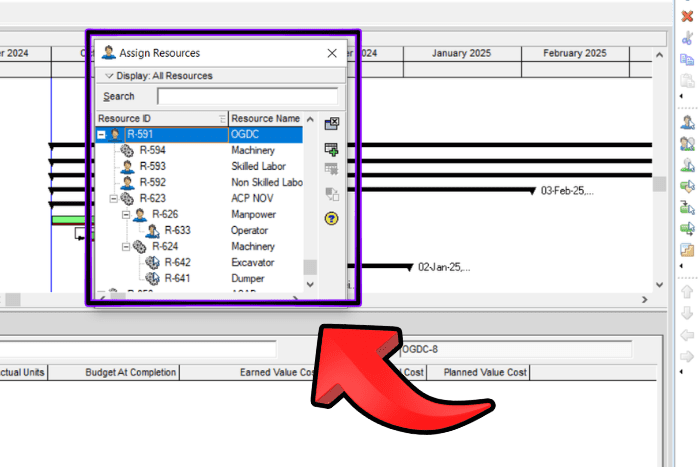
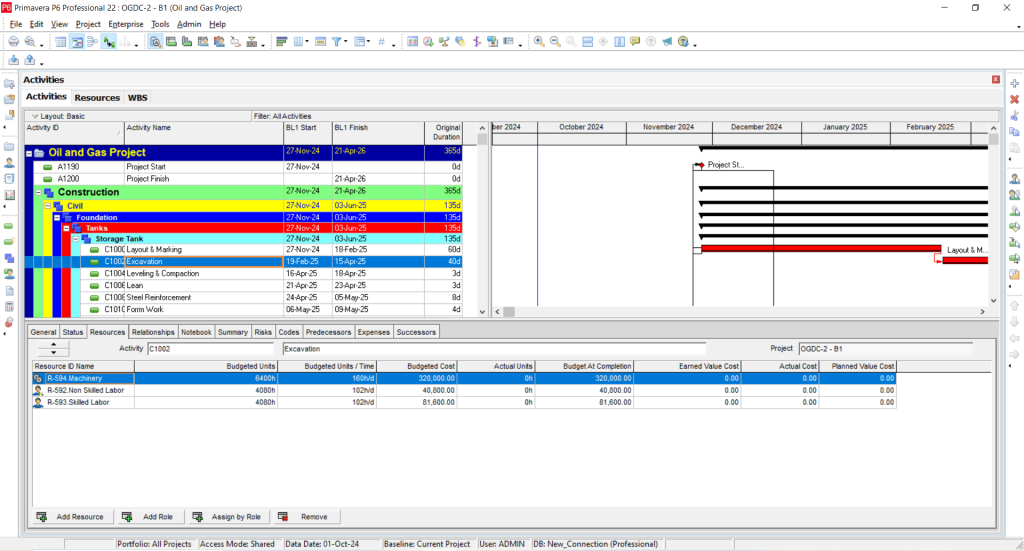
- Resource Leveling: Ensures no resource is overallocated and adjusts schedules accordingly

Managing resources effectively in Primavera P6 helps maintain project efficiency while controlling costs.
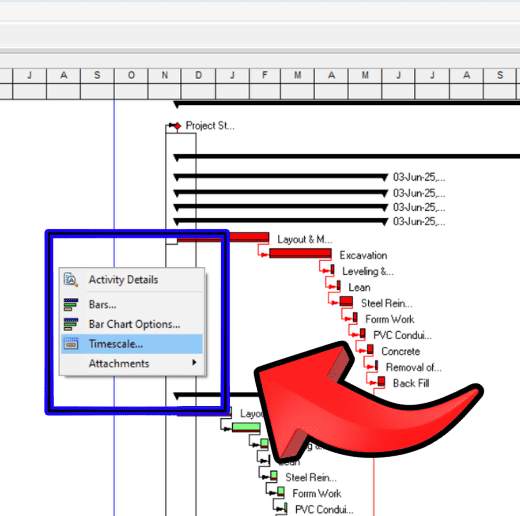
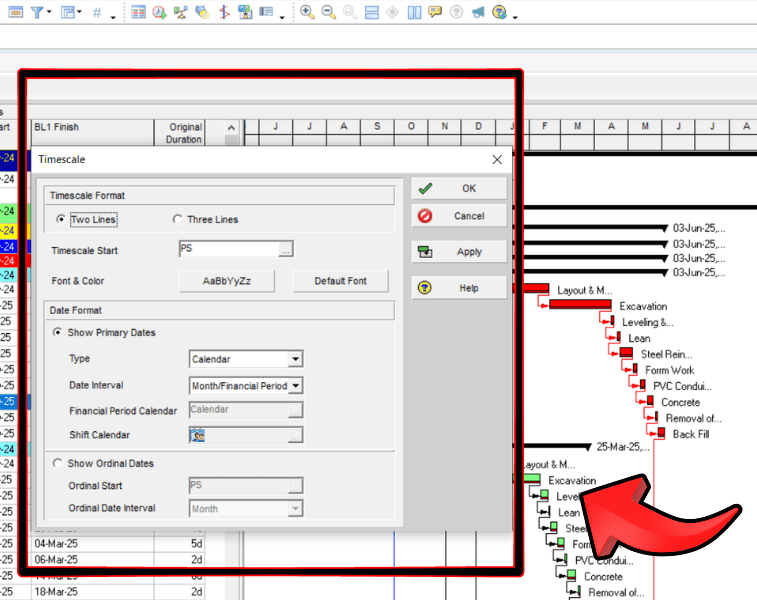
Bars, Time Scales, and Columns
Primavera P6 allows customization of key elements in your project view, such as bars, time scales, and columns, to make project data more visual and easier to understand.
- Bars: Represent activities or milestones on the Gantt chart. You can color-code or customize bar styles to reflect different activity statuses or types (e.g., planned, in-progress, or completed).
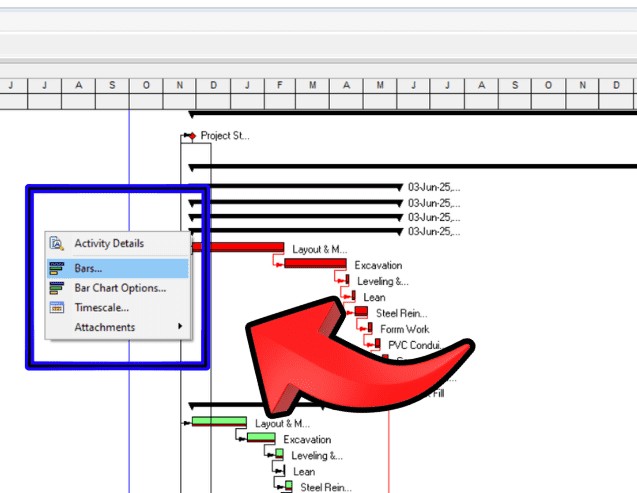
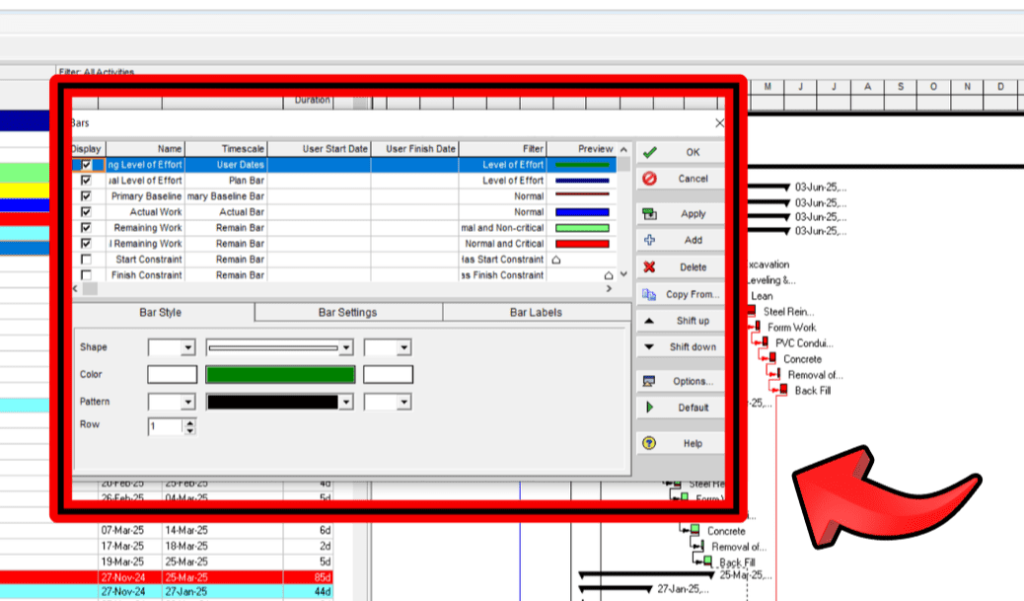
- Time Scales: Customize the time units displayed in the Gantt chart, such as days, weeks, months, or years, to match the project’s timeline and provide a clear overview of project phases.
- Columns: Allows you to display essential project information (like activity name, start and finish dates, duration, and status) in a tabular format. You can add, remove, or reorder columns to highlight the most relevant data for your team.
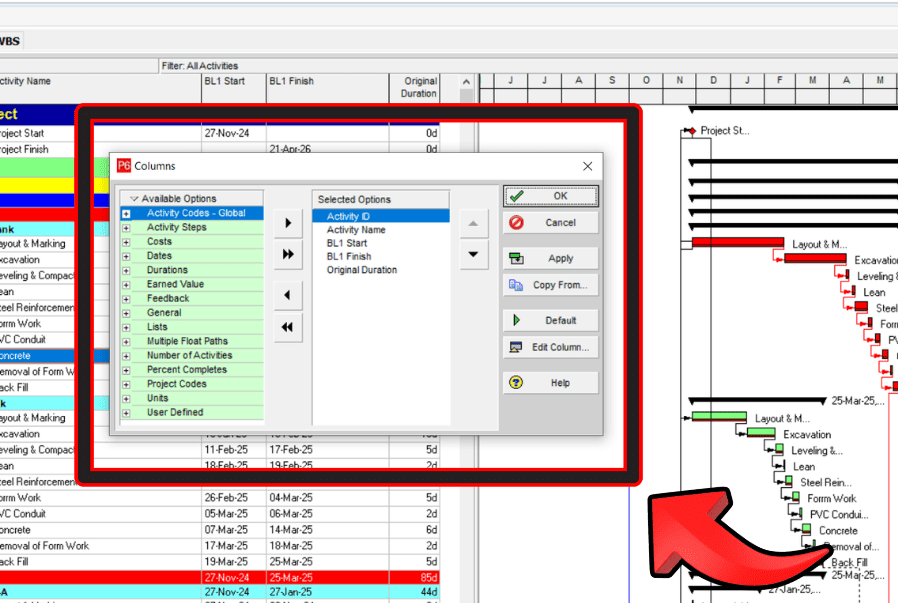
Customizing these elements makes project information more accessible and actionable, helping you focus on what’s most important for project success.
Grouping and Sorting in Primavera P6 Software
Grouping and sorting in Primavera P6 enables users to organize and filter project data based on different criteria. This is especially useful for large projects with many tasks and resources.
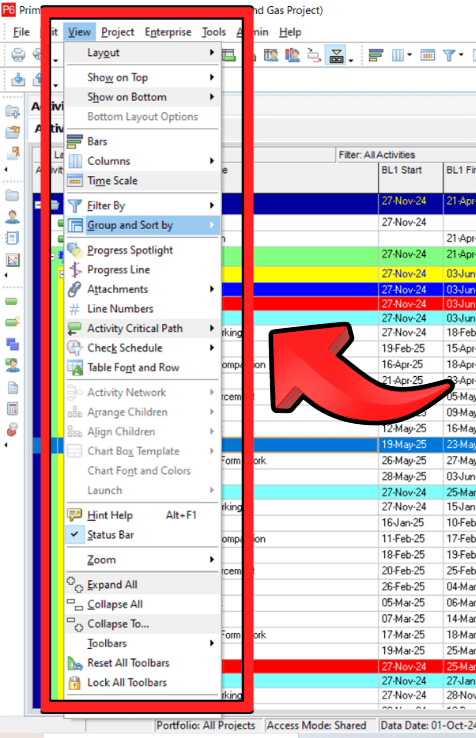
Key aspects of grouping and sorting:
- Grouping: Allows you to organize activities by WBS, resource, activity type, or any other parameter that fits the project’s needs. This makes it easier to view specific project sections or types of activities.
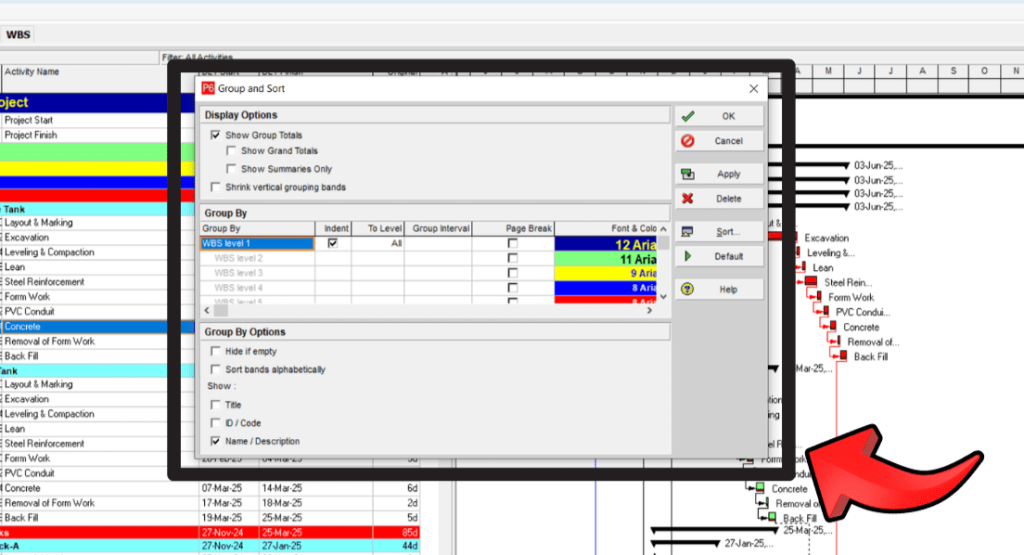
- Sorting: Helps arrange activities in a particular order (e.g., alphabetically, by dates, or by priority) to streamline the planning process and improve tracking.
- Filters: Use filters to display only relevant data, such as late activities, critical path tasks, or tasks assigned to a particular team member.
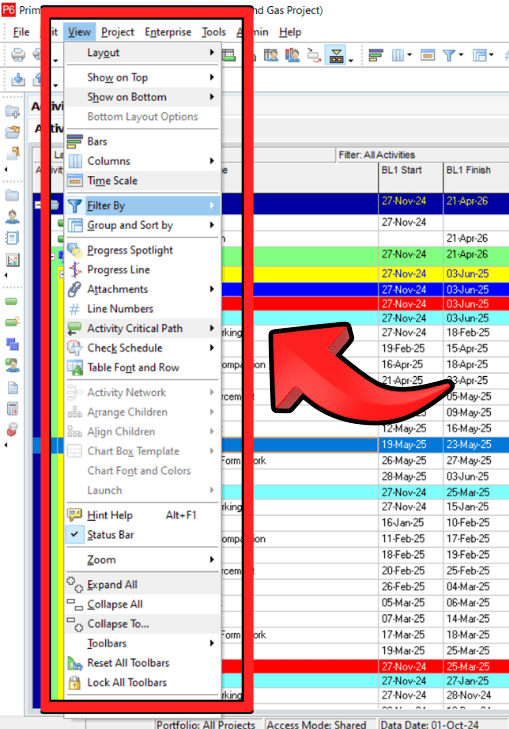
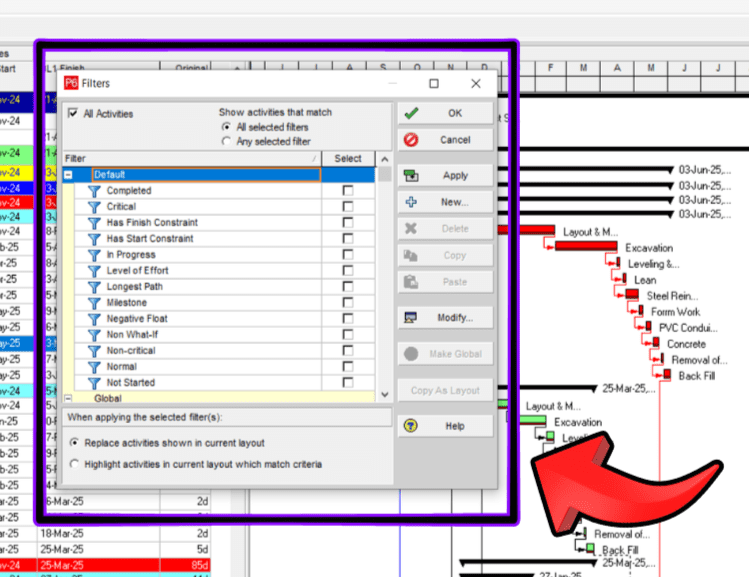
Grouping and sorting in Primavera P6 enhances project visibility and decision-making, making it easier for users to track and analyze data.
For More detailed Learning of Primavera p6
Conclusion:
Mastering the basic settings in Primavera P6 software is crucial for ensuring your project management process is both efficient and effective. By configuring elements like Admin settings, calendars, project structures, and resources, you’re not just setting up a tool – you’re building a solid foundation for streamlined project execution. These settings enable you to track progress, allocate resources, and manage timelines with precision, helping you avoid common project pitfalls and ensuring successful outcomes.
Now that you understand how to navigate these key settings, you’re better equipped to leverage Primavera P6 to its fullest potential.
Ready to take your skills further?
Explore our comprehensive Primavera P6 courses and transform your project management approach today!